How to Dry Herbs at Home for Fresh Flavor All Year
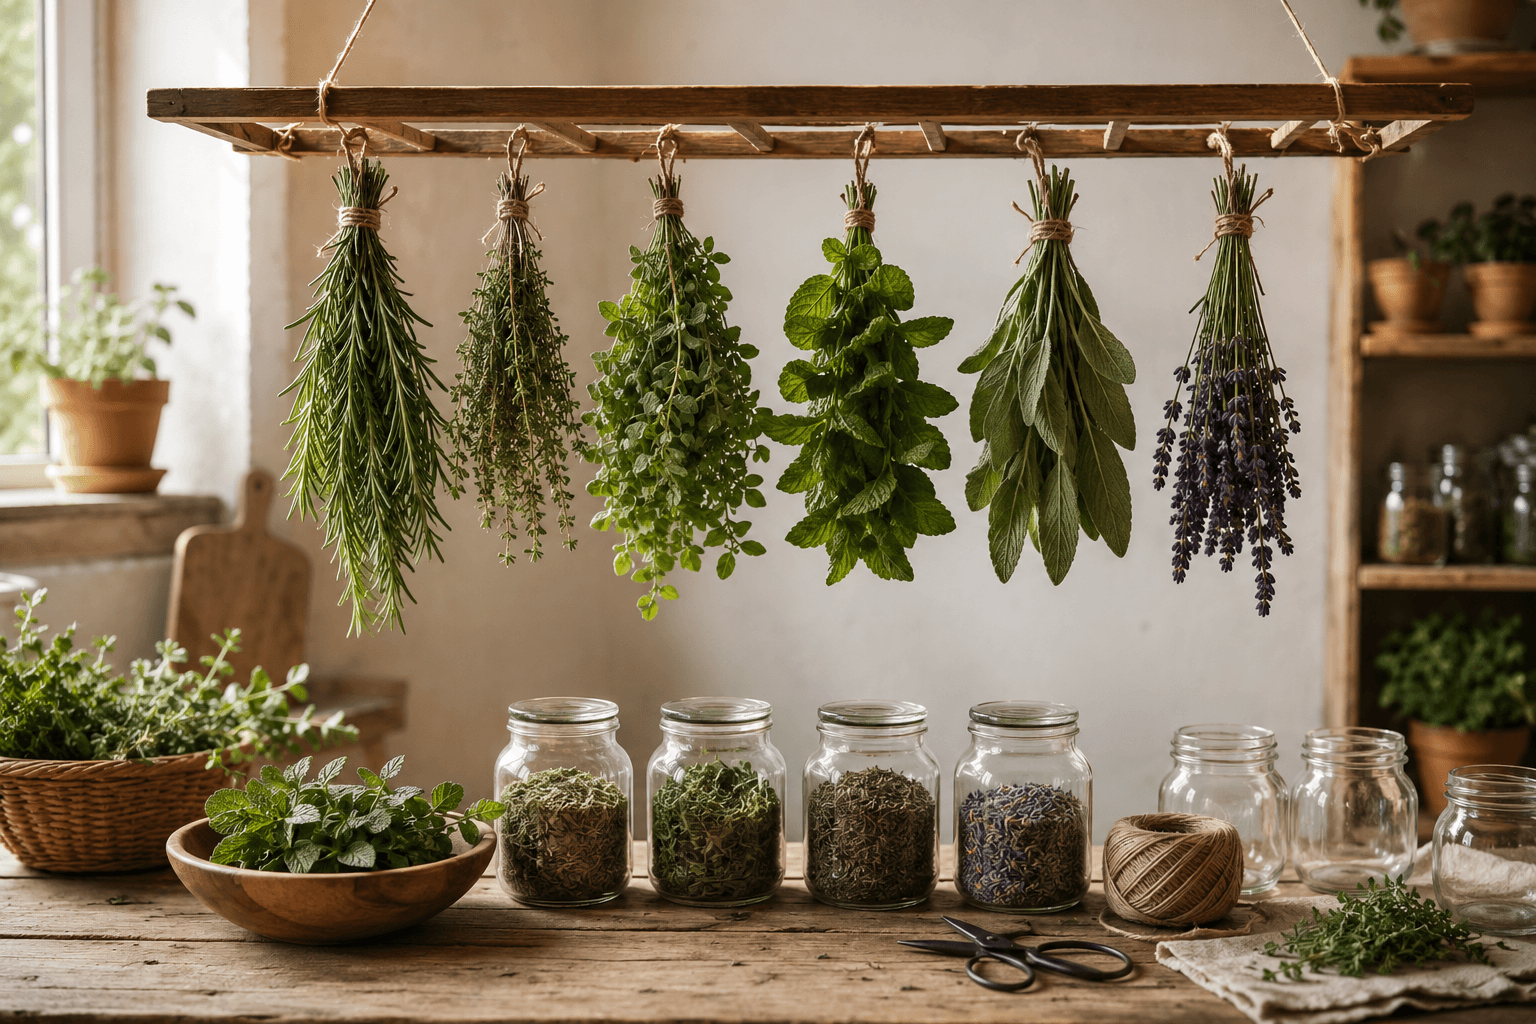
How to dry herbs is one of the easiest food preservation skills to learn when you start growing herbs at home. If you have basil, mint, rosemary, thyme, oregano, parsley, sage, chives, or lavender growing in your garden, balcony, or kitchen window, drying them is a simple way to keep that fresh flavor from going to waste.
Fresh herbs are wonderful, but they do not last forever. A basil plant can grow faster than you can use it. Mint can quickly fill a pot. Rosemary, thyme, and oregano can produce more than you need for one meal. Instead of letting extra herbs wilt, you can dry them and store them for soups, sauces, teas, seasoning blends, roasted vegetables, and homemade gifts.
Herb drying is also one of the most beginner-friendly ways to preserve food. You do not need complicated equipment to begin. Some herbs can be tied into small bundles and air dried. Others can be dried on trays, in a dehydrator, or carefully in a low oven.
In this guide, you will learn how to dry herbs at home, which herbs dry best, when to harvest them, how to avoid mold, and how to store dried herbs so they keep their flavor as long as possible.
Why Drying Herbs Is Worth Learning
Drying herbs is one of the simplest ways to make your garden more useful. Even if you only grow a few pots of herbs, drying the extra leaves helps you stretch your harvest and reduce waste.
Fresh herbs can be expensive at the store, especially if you only need a small amount for one recipe. When you grow and dry your own herbs, you can build a small pantry of homemade flavor from plants you already have.
Drying herbs can help you:
- Save fresh herbs before they wilt
- Make homemade dried herbs for cooking
- Save money on store-bought seasonings
- Preserve herbs from your garden, balcony, or windowsill
- Make homemade tea blends
- Create simple seasoning mixes
- Reduce food waste
- Give small handmade gifts
- Practice beginner food preservation
Drying herbs is one of the easiest food preservation methods for beginners because it does not require canning equipment, special recipes, or a large harvest. You can begin with one small bundle of mint, a few sprigs of rosemary, or extra oregano from a container garden.
It is also a useful skill if you are building a more self-sufficient home. Once you learn how to dry herbs, you can use the same habit every season.
Best Herbs to Dry at Home
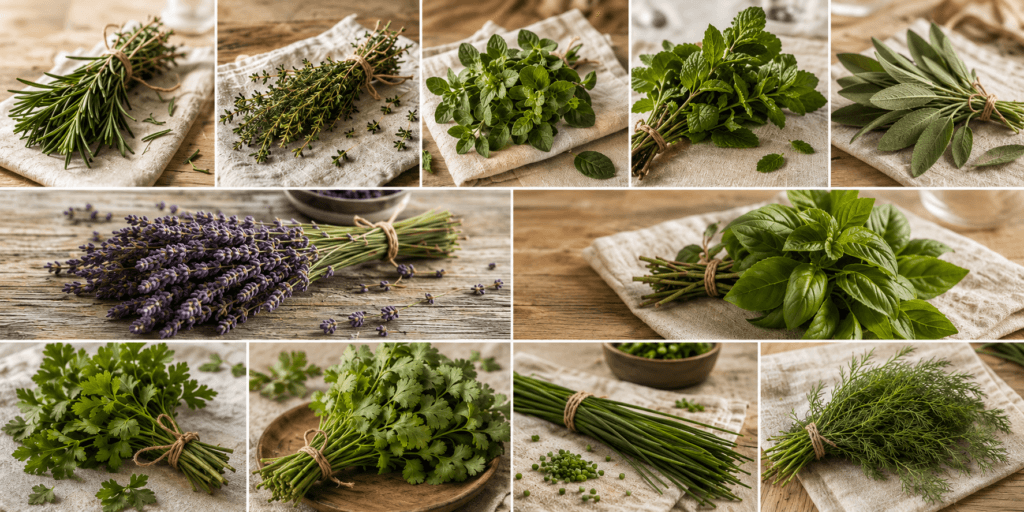
Some herbs dry better than others. Woody herbs with stronger stems and smaller leaves are usually the easiest. Soft leafy herbs can still be dried, but they need more care because they hold more moisture and can lose flavor faster.
Rosemary
Rosemary is one of the best herbs for drying. It has sturdy stems, fragrant leaves, and strong flavor. Dried rosemary is useful for roasted vegetables, potatoes, bread, soups, chicken, and seasoning blends.
Thyme
Thyme dries very well because the leaves are small and low in moisture. It keeps a strong flavor and is excellent for soups, sauces, roasted vegetables, and marinades.
Oregano
Oregano is perfect for drying. It is useful in pizza, pasta sauces, tomato dishes, roasted vegetables, and homemade Italian-style seasoning blends.
Mint
Mint dries well and is especially useful for tea. You can also use dried mint in desserts, drinks, sauces, and homemade herbal blends.
Sage
Sage has a strong flavor and dries easily. It is useful in savory dishes, roasted vegetables, stuffing, beans, and fall cooking.
Lavender
Lavender can be dried for tea blends, sachets, homemade gifts, and fragrant pantry jars. Make sure you grow culinary lavender if you plan to use it in food.
Basil
Basil can be dried, but it is more delicate than woody herbs. It can lose some of its fresh flavor during drying, but it is still useful for sauces, soups, and seasoning blends.
Parsley
Parsley can be dried, but it needs careful drying because it has a lot of moisture. Once dried, it works well in soups, sauces, eggs, potatoes, and everyday cooking.
Cilantro
Cilantro can be dried, but the flavor changes more than some other herbs. If you love fresh cilantro flavor, freezing may preserve it better. Still, dried cilantro can be useful in soups, rice dishes, and seasoning mixes.
Chives
Chives can be dried, but they become more delicate and mild. They are better dried with a dehydrator or low oven than by thick bunching.
Dill
Dill dries well and is useful for fish, potatoes, salads, pickles, yogurt sauces, and seasoning blends.
If you are new to drying herbs, start with rosemary, thyme, oregano, mint, and sage. These are easier to dry successfully than basil, parsley, cilantro, or chives.
When to Harvest Herbs for Drying
The way you harvest herbs affects the flavor and quality of the dried result. The best time to harvest is usually in the morning after the dew has dried but before the heat of the day becomes strong.
Morning harvests are usually fresh, fragrant, and less stressed by heat. Avoid harvesting wet herbs because extra moisture can slow drying and increase the risk of mold.
For best flavor, harvest herbs before they flower. Once some herbs start flowering, the flavor of the leaves may become weaker or more bitter. This is especially true for basil, cilantro, and some leafy herbs.
Follow these simple harvesting tips:
- Harvest in the morning after dew dries
- Choose healthy, clean leaves
- Avoid yellow, damaged, or diseased leaves
- Harvest before flowering when possible
- Do not harvest wet herbs
- Do not cut more than one-third of the plant at once
- Use clean scissors or pruning snips
If you are still building your herb garden, these herb garden ideas can help you choose useful herbs for cooking, tea, and drying.
Even a small balcony herb garden can produce enough mint, basil, thyme, or oregano to dry for later use.
How to Prepare Herbs Before Drying
Before drying herbs, sort through your harvest. Remove yellow leaves, damaged stems, insects, and any dirty or unhealthy parts.
If your herbs are clean and grown without soil splashing on them, you may not need to wash them. Washing adds moisture, which can make drying take longer. However, if the herbs are dusty, dirty, or came from outdoors, rinse them gently under cool water.
After rinsing, dry them very well. You can use a clean kitchen towel, paper towels, or a salad spinner. Herbs should be as dry as possible before drying begins.
Preparation steps:
- Remove damaged leaves.
- Shake off dirt or insects.
- Rinse gently only if needed.
- Dry completely with a towel or salad spinner.
- Keep stems on if air drying.
- Remove leaves from stems if using trays, an oven, or dehydrator.
- Spread herbs in a thin layer so air can move around them.
Any damaged leaves or leftover stems can go into your compost, making composting for beginners a natural next skill to learn.
Method 1: Air Drying Herbs
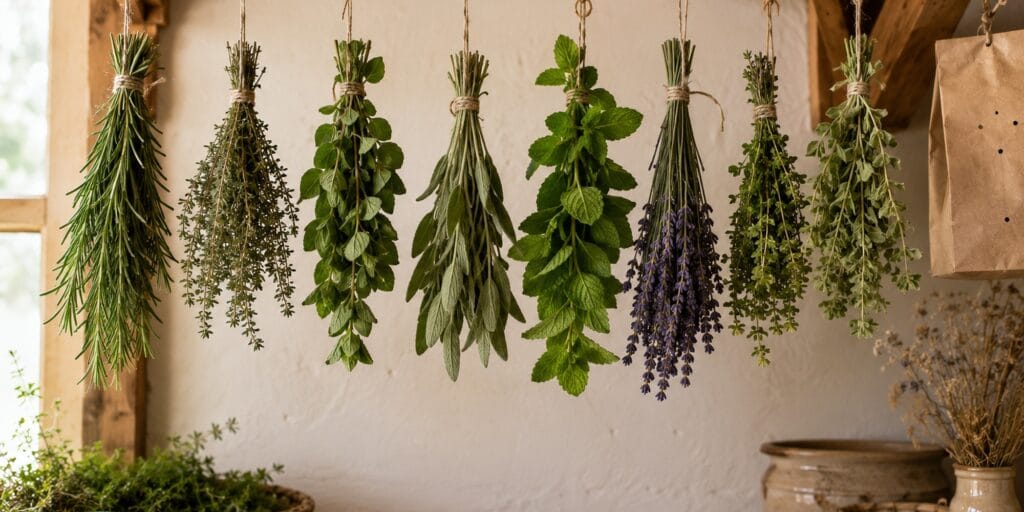
Air drying is the most traditional herb drying method. It works best for herbs with lower moisture content, such as rosemary, thyme, oregano, sage, mint, and lavender.
This method does not require electricity or special equipment. You only need twine, small herb bundles, and a warm, dry place with good airflow.
How to Air Dry Herbs
Gather small bundles of herbs and tie the stems together with twine or string. Keep the bundles small because thick bunches can trap moisture and dry too slowly.
Hang the bundles upside down in a dry, airy spot away from direct sunlight. A pantry, kitchen corner, drying rack, covered porch, or warm room can work well if the space is not humid.
You can also place a paper bag loosely around each bundle to protect the herbs from dust. Make small holes in the bag for airflow.
Air drying usually takes one to three weeks depending on the herb, humidity, bundle size, and room temperature.
Best Herbs for Air Drying
- Rosemary
- Thyme
- Oregano
- Sage
- Mint
- Lavender
- Marjoram
Air drying is simple, but it is not always the best choice in humid climates. If your home is humid, a dehydrator or low oven may be safer because herbs can mold before they dry fully.
Method 2: Drying Herbs on a Screen or Tray
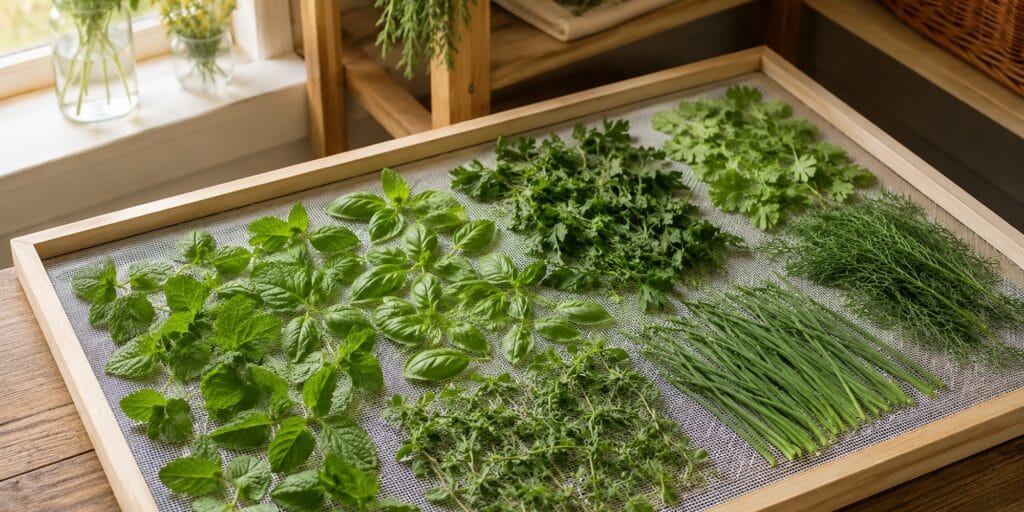
Tray drying is a good option for small harvests. It works well if you do not want to hang bundles or if you are drying loose leaves.
You can use a drying screen, mesh rack, cooling rack, or a tray lined with a clean towel or parchment paper. The goal is to spread the herbs in a thin layer so air can move around them.
How to Dry Herbs on a Tray
Place clean, dry herb leaves in a single layer. Do not pile them too thickly. Put the tray in a warm, dry place away from direct sunlight.
Turn or gently move the herbs once a day so they dry evenly.
This method is useful for:
- Mint leaves
- Basil leaves
- Parsley
- Cilantro
- Dill
- Chives
- Small thyme or oregano leaves
Tray drying can take several days to two weeks depending on the herb and room conditions. The herbs are ready when they feel crisp and crumble easily.
Method 3: Drying Herbs in a Dehydrator
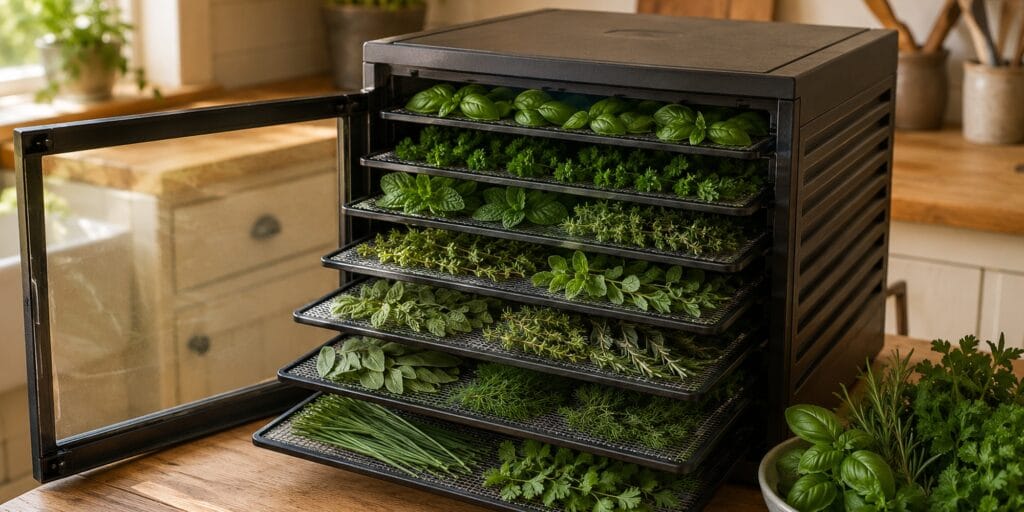
A dehydrator is one of the most reliable ways to dry herbs. It gives steady airflow and low heat, which helps herbs dry evenly.
This method is especially helpful if you live in a humid area or want more consistent results.
How to Dry Herbs in a Dehydrator
Place clean, dry herbs in a single layer on dehydrator trays. Avoid overcrowding. Set the dehydrator to a low herb-safe temperature according to your machine’s instructions.
Check the herbs regularly. Thin leaves may dry quickly, while thicker herbs may take longer.
A dehydrator works well for:
- Basil
- Parsley
- Mint
- Thyme
- Oregano
- Rosemary
- Sage
- Dill
- Chives
- Cilantro
The herbs are finished when the leaves are crisp and completely dry. Let them cool before storing, because warm herbs can create condensation inside jars.
Method 4: Drying Herbs in the Oven
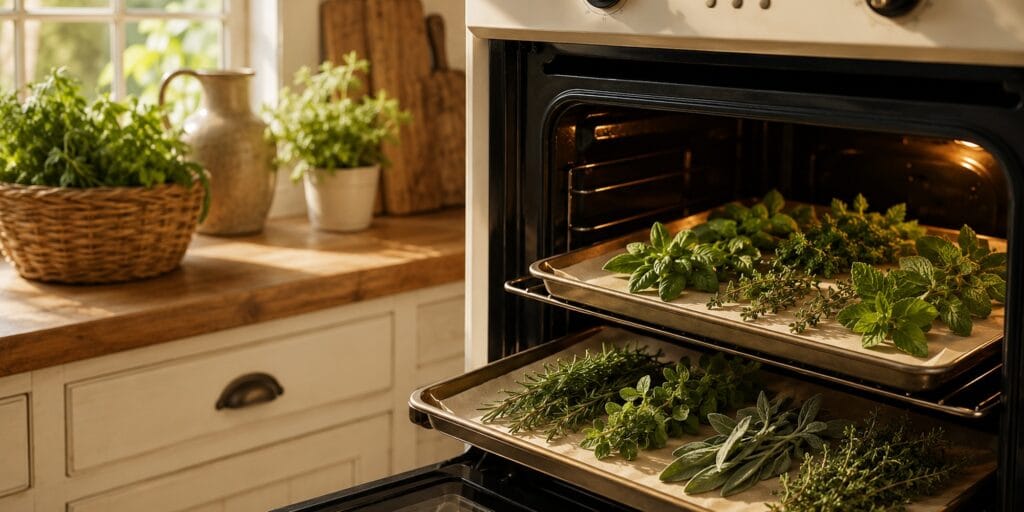
Oven drying is a faster method, but it needs care. Too much heat can damage flavor and color. The goal is to use the lowest possible heat and check often.
This method is useful if you do not have a dehydrator and need to dry herbs quickly.
How to Dry Herbs in the Oven
Place clean, dry herbs in a single layer on a baking sheet. Use parchment paper if needed. Set the oven to the lowest temperature possible.
Keep the oven door slightly open if safe for your oven and kitchen setup. This helps moisture escape. Check the herbs often and turn them gently.
Oven drying can take one to several hours depending on the herb and temperature.
Use oven drying carefully for:
- Basil
- Parsley
- Mint
- Thyme
- Oregano
- Rosemary
- Sage
Do not leave herbs unattended for long. They can go from dry to burnt quickly if the heat is too high.
How to Know When Herbs Are Fully Dry
Herbs must be fully dry before storage. If they still contain moisture, they can mold in jars.
Signs that herbs are fully dry:
- Leaves feel crisp
- Leaves crumble easily
- Stems snap instead of bend
- No soft or damp spots remain
- Herbs feel dry, not leathery
- The smell is herbal and clean, not musty
If you are unsure, let them dry a little longer. It is better to wait than to store herbs too early.
After drying, let herbs cool completely before placing them in jars. This is especially important if you used an oven or dehydrator.
How to Store Dried Herbs
Proper storage helps dried herbs keep their flavor longer. The best containers are clean, dry glass jars with tight lids.
Store herbs away from light, heat, and moisture. A pantry, cabinet, or drawer is better than a shelf near the stove.
Good storage tips:
- Use clean, dry jars
- Label each jar with herb name and date
- Store herbs away from sunlight
- Keep jars away from heat and steam
- Store leaves whole when possible
- Crush herbs only when ready to use
- Check jars after a few days for moisture
Whole dried leaves keep flavor longer than crushed herbs. If you crush everything right away, the herbs may lose flavor faster.
Most homemade dried herbs taste best within 6 to 12 months. They may still be safe after that if stored properly, but the flavor can fade.
How to Use Dried Herbs
Dried herbs are useful in many everyday meals. They are more concentrated than fresh herbs, so you usually need less.
A common kitchen rule is to use about one-third the amount of dried herbs when replacing fresh herbs. For example, if a recipe calls for one tablespoon of fresh herbs, you may use about one teaspoon of dried herbs.
Use dried herbs in:
- Soups
- Stews
- Sauces
- Roasted vegetables
- Marinades
- Salad dressings
- Homemade seasoning blends
- Herbal teas
- Herb salts
- Bread recipes
- Beans and lentils
- Pantry mixes
- Homemade gifts
Dried mint can become tea. Dried oregano and thyme can become seasoning blends. Dried rosemary can flavor potatoes and bread. Dried lavender can be used in sachets or culinary recipes if it is food-safe lavender.
Common Herb Drying Mistakes
Drying herbs is simple, but a few mistakes can ruin the flavor or cause mold.
Drying Wet Herbs
Wet herbs take longer to dry and can mold. Always dry herbs well after washing.
Using Too Much Heat
High heat can damage color, flavor, and aroma. Use low heat for oven or dehydrator drying.
Storing Herbs Before They Are Fully Dry
This is one of the biggest mistakes. Herbs must be crisp and completely dry before storage.
Drying Herbs in Direct Sunlight
Direct sunlight can fade color and reduce flavor. Choose a warm, dry, shaded area instead.
Making Bundles Too Thick
Thick bundles dry slowly and can trap moisture. Keep air-drying bundles small.
Crushing Herbs Too Early
Crushed herbs lose flavor faster. Store leaves whole and crush them when cooking.
Using Dirty Jars
Storage jars should be clean and completely dry. Moisture or residue can spoil herbs.
Forgetting to Label Jars
Many dried herbs look similar after storage. Label jars with the herb name and date.
Keeping Herbs Near the Stove
Heat and steam can reduce shelf life. Store jars in a cool, dry cabinet.
Waiting Too Long to Harvest
For the best flavor, harvest before herbs become tired, woody, or heavily flowered.
Before harvesting, it also helps to avoid common herb gardening mistakes so your plants stay healthy and productive.
Best Beginner Herb Drying Plan
If this is your first time drying herbs, start with easy herbs instead of delicate ones.
A simple beginner drying plan could include:
- Rosemary
- Thyme
- Oregano
- Mint
These herbs dry well and are useful in the kitchen. They are also more forgiving than basil, parsley, or cilantro.
Start with one small batch. Dry a few sprigs, store them in a jar, and use them in cooking. Once you feel confident, try drying larger harvests or more delicate herbs.
A beginner-friendly process could look like this:
- Harvest rosemary, thyme, oregano, or mint in the morning.
- Remove damaged leaves.
- Rinse only if needed.
- Dry completely.
- Tie small bundles or spread on a tray.
- Dry until crisp.
- Store in a labeled glass jar.
- Use within 6 to 12 months for best flavor.
You do not need to preserve a huge harvest right away. A small jar of homemade dried herbs is already a useful first step.
FAQ About Drying Herbs
What is the easiest way to dry herbs?
The easiest way to dry herbs is air drying small bundles in a warm, dry place with good airflow. This works best for rosemary, thyme, oregano, sage, mint, and lavender.
For softer herbs like basil and parsley, a dehydrator or low oven may give more reliable results.
Can I air dry herbs indoors?
Yes, you can air dry herbs indoors if the room is dry, warm, and has good airflow. Avoid humid rooms and avoid direct sunlight.
Hang small bundles upside down or spread leaves on a screen or tray.
How long does it take herbs to dry?
Herbs can take a few days to several weeks to dry depending on the method. Air drying often takes one to three weeks. A dehydrator or low oven can dry herbs much faster.
The herbs are ready when they are crisp, crumbly, and completely dry.
Should I wash herbs before drying?
Wash herbs only if needed. If they are dusty or dirty, rinse them gently and dry them completely before drying. Extra moisture can slow the drying process and increase the risk of mold.
What herbs are best for drying?
The best herbs for drying include rosemary, thyme, oregano, mint, sage, lavender, dill, and marjoram. Basil, parsley, cilantro, and chives can also be dried, but they need more care.
Can I dry basil?
Yes, basil can be dried, but it is more delicate than woody herbs. It can lose some fresh flavor during drying. Use a dehydrator, tray, or low oven for better results, and store it in a dark, dry place.
Can I dry mint for tea?
Yes, mint is excellent for drying and makes a simple homemade tea. Harvest healthy mint leaves, dry them fully, and store them in a clean glass jar away from heat and light.
How do I know dried herbs are safe to store?
Dried herbs are ready to store when they are fully crisp and no moisture remains. Leaves should crumble easily and stems should snap. If they feel soft, leathery, or damp, keep drying them.
How long do dried herbs last?
Homemade dried herbs usually have the best flavor for 6 to 12 months. They may last longer if stored properly, but the flavor will slowly fade.
Are homemade dried herbs stronger than store-bought herbs?
Homemade dried herbs can taste stronger and fresher than store-bought herbs if they are harvested at the right time, dried properly, and stored well. For best flavor, store leaves whole and crush them only when using them.
Conclusion
Learning how to dry herbs is a simple way to preserve your garden harvest and enjoy fresh flavor throughout the year. Whether your herbs come from a backyard garden, a balcony shelf, a windowsill, or a few containers, drying helps you make the most of what you grow.
Start with easy herbs like rosemary, thyme, oregano, mint, and sage. Harvest them in the morning, dry them completely, and store them in clean glass jars away from light, heat, and moisture.
Once you feel confident, you can dry basil, parsley, cilantro, chives, dill, lavender, and other herbs for cooking, tea, seasoning blends, and homemade gifts.
Herb drying does not need to be perfect or complicated. Begin with one small bundle, learn the process, and build your pantry one jar at a time.
Want more beginner-friendly gardening, food preservation, and small-space homesteading ideas? Subscribe to the Dreamsteading newsletter and get practical guides sent straight to your inbox.