Small Vegetable Garden Layouts: 10 Productive Plans for Beginners

Small vegetable garden layouts should make growing easier, not turn every inch of soil into a crowded puzzle. A useful plan gives vegetables enough room to mature, keeps every crop within reach, protects a dependable path, and places tall plants where they will not shade shorter crops unnecessarily.
The 10 plans below are adaptable examples for beginners. They include raised beds, in-ground plots, narrow borders, vertical gardens, and containers. Crop quantities are intentionally flexible because final spacing must follow the selected variety, seed packet, local climate, and length of the growing season.
In Short
A productive small vegetable garden layout begins with a sunny, well-drained site and planting areas that can be reached without stepping into the soil. Place trellises and tall crops along the edge that causes the least unwanted shade, group crops with compatible seasonal needs, and reserve open space for watering and harvesting. Start with a manageable number of vegetables, then reuse harvested areas through carefully timed succession planting.
Key Takeaways
- Choose dimensions according to your comfortable reach and the sides from which the bed can be accessed.
- Draw vegetables at mature size instead of using transplant or seedling size.
- Put tall crops and trellises where their shade will cause the least conflict.
- Use succession planting only when the replacement crop can mature in the remaining season.
- Grow vegetables you will eat, and give large crops enough space rather than crowding the plan.
Choose the Right Small Vegetable Garden Layout
Measure the available area and mark doors, gates, utilities, drains, existing plants, and the nearest water source. Observe direct sunlight at several times of day. Tomatoes, peppers, eggplants, and many other fruiting vegetables generally perform best in the sunniest part of the garden; leafy crops may be more adaptable when light is limited.
Draw the site to scale with a graph-paper garden planner or plain paper. Include the outside dimensions of beds and containers—not just their interior planting area. Then add paths, door swings, the space required to kneel or harvest, and mature plant footprints.
Keep every planting area within reach
A bed accessible from both long sides can be wider than one placed against a fence. Many raised beds fall within a 2- to 4-foot width, but your reach and mobility should determine the final dimension. You should not need to step into the growing soil, where foot traffic can create compaction. Review the raised-bed gardening guide before choosing height, width, materials, and soil.
Test the soil and drainage
For an in-ground garden, use a laboratory soil test when available rather than applying fertilizer by guesswork. A basic soil-test kit may provide limited information, but local laboratory guidance is more useful for nutrient and pH decisions. Avoid areas that remain waterlogged, receive contaminated runoff, or sit over utility access.
Plan by crop role
Instead of assigning every square to a specific cultivar months in advance, divide the layout into roles: tall climbers, long-season fruiting crops, compact roots, leafy greens, herbs, and quick succession crops. This makes the plan adaptable to local planting dates and the varieties available to you. These easy vegetables for beginners can help you choose a manageable first group.
Match the crop list to your kitchen and time
Productivity is not simply the greatest possible weight from a bed. A garden is more useful when it produces vegetables you regularly eat in quantities you can harvest and manage. Give priority to a few dependable crops, then add one or two experiments. Consider how often each crop needs sowing, training, pruning, pest inspection, and harvesting. A plan filled with ten demanding crops may produce less usable food than a simpler layout you can maintain consistently.
The plans are examples, not universal planting calendars. Check local frost dates, seasonal heat, seed-packet spacing, mature variety size, and Cooperative Extension guidance before planting. Do not copy a crop into a season or light exposure that does not suit it.
10 Productive Small Vegetable Garden Layouts
1. Simple 4 × 4-Foot Beginner Bed

Best for: A first garden with access from all four sides.
Divide the bed into four broad crop zones rather than many tiny squares. Place one compact fruiting crop in a sunny section, reserve one section for bush beans or another moderate-size crop, and use the remaining sections for leafy greens, radishes, scallions, or herbs. A short trellis may run along the edge that produces the least unwanted shade.
Seasonal change: Replace finished spring greens or radishes with a warm-season or fall crop suited to your calendar. The limitation is scale: sprawling squash, melons, and multiple full-size tomatoes can overwhelm this bed.
2. Balanced 4 × 8-Foot All-Purpose Bed
Best for: A beginner who wants several crop types in one reachable bed.
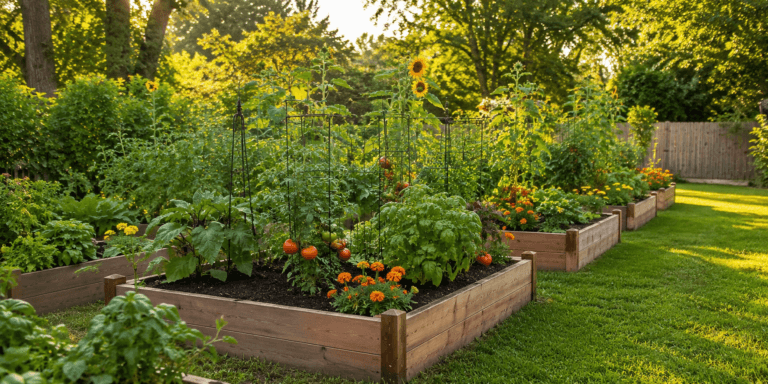
Reserve one short end for a stable trellis with pole beans or a compact supported cucumber. Place long-season crops such as tomatoes or peppers in the next zone, then use the middle and front for bush beans, chard, lettuce, roots, and herbs. Keep the bed accessible from both long sides. A modular raised-bed kit is an option, but confirm its outside measurements and material before purchasing.
Seasonal change: Early peas or greens can be followed by beans, basil, or a locally appropriate fall crop. Avoid planting tall crops across the entire sunny edge if they will shade everything behind them.
3. Two 2 × 6-Foot Beds With a Central Path
Best for: A narrow rectangular plot and gardeners who prefer easy one-sided reach.
Place two slim beds parallel to each other with a continuous central path at least 24 inches wide; increase the path when you need more comfortable access or use mobility equipment. Use one bed for longer-season crops and the other for quicker roots, greens, herbs, and bush beans. Put vertical support at the rear or least-shading end.
Seasonal change: Replant short rows at intervals rather than sowing the entire quick-crop bed at once. This layout is orderly, but the outer sides must remain reachable or the beds should be narrow enough to maintain entirely from the central path.
4. Productive 3 × 6-Foot Trellis Bed
Best for: A small sunny site where vertical production is the priority.
Install a sturdy vegetable trellis along one 6-foot edge before planting. Use it for pole beans, peas in their proper season, or a suitable supported cucumber. Place medium-height crops in front of the trellis and low roots, greens, or herbs along the accessible edge. The garden remains compact because climbing crops use height instead of trailing across the path.
Seasonal change: Switch between cool-season and warm-season climbers only when local timing allows. Follow the simple trellis tutorial if you need a freestanding support. The limitation is shade: position the structure deliberately and anchor it for mature crop weight and wind.
5. Narrow 2 × 8-Foot Fence-Line Garden
Best for: A sunny boundary, side yard, or long strip that can be reached from one side.
Keep the bed approximately 2 feet deep so the back remains reachable. Arrange low herbs and quick crops near the front, compact peppers or chard through the middle, and properly supported climbers at the rear. Leave access to the fence and do not assume it can carry a trellis without permission and structural confirmation.
Seasonal change: Divide the length into four sections and replace crops section by section. This reduces the chance of clearing the whole border at once. Reflected heat and reduced airflow beside solid fences may influence crop choice and watering.
6. Practical 6 × 8-Foot Central-Path Plot
Best for: A compact in-ground garden that needs one obvious working route.
Run a 24-inch central path through the 8-foot length, leaving two planting strips approximately 2 feet wide. Place a rear trellis across the sunny end, one or two carefully spaced long-season crops in the brightest strip, and quick crops, herbs, roots, or bush beans in the other sections. Keep irrigation lines out of the path.
Seasonal change: Use the strips as four planting blocks so one can be replanted without disturbing the others. The path consumes part of the footprint, but it protects soil structure and makes every crop easier to inspect and harvest.
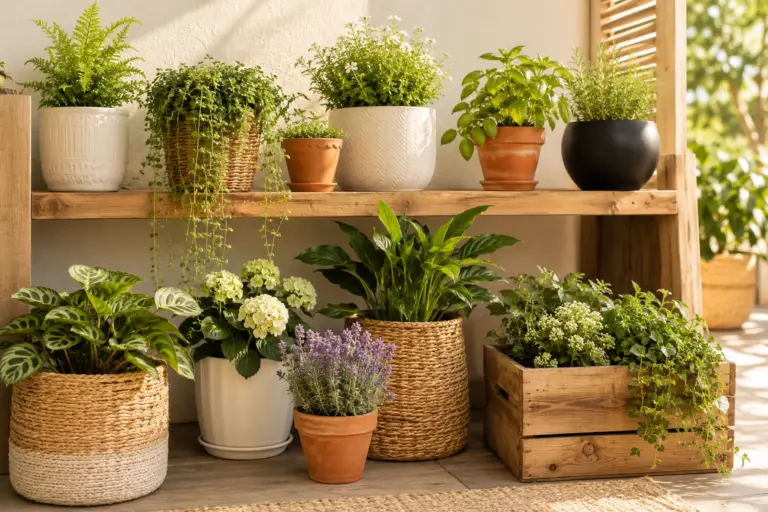
7. Flexible 6 × 6-Foot Patio Container Layout
Best for: Renters, paved spaces, or gardeners who cannot install permanent beds.
Place the largest containers along the back and side edges without blocking doors, drains, or railings. Use suitably large, stable pots for tomatoes, peppers, eggplants, or cucumbers; medium containers can hold chard or bush beans, while smaller containers suit many herbs and shallow-rooted greens. Group pots by similar light and watering needs and maintain a clear central working area.
Seasonal change: Replace cool-season greens with heat-tolerant crops when conditions change, then reverse the sequence where fall planting is possible. Containers dry faster than in-ground soil, so this layout needs frequent moisture checks and realistic container volumes.
8. 4 × 8-Foot Salad and Succession Bed
Best for: Gardeners who value repeated harvests of greens, roots, and herbs.
Divide the bed into four 2-foot-long bands. Assign one to leafy greens, one to radishes or other small roots, one to scallions and herbs, and one to the next scheduled sowing. Plant small amounts at planned intervals instead of filling the entire bed on one date. Provide temporary shade only when appropriate for local heat and the selected crops.
Seasonal change: Remove spent crops promptly and replant only when enough suitable growing time remains. This plan can produce a steady sequence, but it requires regular sowing, thinning, watering, and records.
9. 4 × 8-Foot Salsa Garden
Best for: A warm, sunny bed dedicated to a small group of frequently used crops.
Place properly supported tomatoes where they will not shade shorter plants, then assign separate zones to peppers, onions or scallions, and cilantro or another suitable herb. Because cilantro often performs poorly in sustained heat, treat it as a seasonal crop rather than assuming it will match peak tomato harvest everywhere. Choose compact cultivars and follow their mature spacing.
Seasonal change: Use the herb and onion sections for another suitable crop when they finish. Plant combinations can improve organization, but they do not guarantee pest control; the evidence-aware guide to companion planting for beginners explains the limits.
10. 8 × 10-Foot Four-Bed Modular Garden
Best for: A beginner ready to manage several crop groups while preserving clear paths.
Arrange four small beds around connected paths, adjusting individual bed size so every center is reachable. Assign one bed to trellised crops, one to long-season fruiting vegetables, one to roots and leafy crops, and one to herbs, succession sowings, or flowers. A compact drip-irrigation kit can simplify watering when zones and emitter placement match crop needs.
Seasonal change: Move crop families among the beds when practical and record what grew where. Rotation is harder in a very small garden because crop families may occupy uneven areas; use the principles in crop rotation for beginners without forcing an unrealistic schedule.
How to Adapt These Plans to Your Climate
Treat every crop label as a role that can be replaced. A trellis zone might hold peas in a cool season and beans or cucumbers in warm weather. A salad zone may shift from lettuce and radishes to chard, basil, bush beans, or an empty mulched section during severe heat. Local frost dates, temperature, day length, and cultivar maturity determine what is realistic.
Put long-season crops in first, then use remaining spaces for quick crops that can finish without being smothered. Before sowing a replacement, compare its maturity estimate with the likely end of suitable weather. Succession planting is productive only when each generation has time, light, water, and space to develop.
[ds_tip]
Keep a simple garden map with planting dates, cultivar names, and harvest notes. At the end of the season, mark which zones became crowded, shaded, dry, or difficult to reach. Those observations are more useful for revising next year’s layout than copying a new generic plan.
[/ds_tip]
Common Small Vegetable Garden Layout Mistakes
Planning with seedling dimensions
Young transplants leave large gaps, but those gaps are temporary. Draw the mature width and height of each crop. Crowding may reduce airflow, complicate inspection, and create competition for light, water, and nutrients.
Growing too many large crops
Full-size tomatoes, sprawling squash, melons, pumpkins, and corn can consume a large share of a small plot. Choose compact or supported varieties where suitable, but do not assume the word “compact” eliminates normal root, light, water, and airflow needs.
Removing paths to gain planting space
A plan is not productive if you must step into the soil or cannot reach the harvest. Paths support watering, weeding, pest inspection, and safe movement. Protect access first and use vertical or succession techniques selectively.
Treating companion planting as pest control
Plant diversity can be useful, but no arrangement replaces regular inspection and correct identification. Check both sides of leaves, stems, and fruit, then choose a crop-appropriate response. The guide to garden pest control for beginners provides a more reliable decision process.
Forgetting the water route
Dragging a hose across beds can damage plants, while containers may dry much faster than nearby ground. Plan how water will reach every zone before planting. Group crops thoughtfully, but adjust irrigation according to soil, weather, root depth, and growth stage.
Myth
More plants always produce more food in a small garden
Reality
Planting beyond the mature spacing of a crop does not guarantee a larger harvest. Severe crowding can reduce light and airflow, increase competition, and make maintenance harder. Productivity comes from choosing suitable crops, protecting access, maintaining plant health, and reusing space at realistic seasonal intervals.
Frequently Asked Questions
What is a good beginner vegetable garden size?
A single 4 × 4-foot bed can be a manageable first project, while a 4 × 8-foot bed provides more flexibility. The best size is one you can reach, water, weed, and harvest consistently. Start smaller when your time, water access, or experience is limited.
What vegetables should go on the north side of a garden?
In much of the Northern Hemisphere, taller crops and trellises are often placed toward the north side to reduce shade on shorter sun-loving crops. Buildings, fences, slopes, and local sun angles can change the best position, so observe the site before deciding.
How wide should a small vegetable bed be?
The bed should be narrow enough to reach the center without stepping into it. Beds accessible from both long sides are commonly 2 to 4 feet wide; a bed accessible from only one side should usually be narrower. Your comfortable reach and mobility determine the final width.
Can vegetables be planted closer together in a raised bed?
Use the spacing guidance for the selected crop and variety rather than assuming every raised bed supports intensive spacing. Soil quality does not remove mature plants’ need for light, airflow, water, nutrients, and root space.
What vegetables work well in succession planting?
Leafy greens, radishes, beans, cucumbers, and several other crops may work in succession when temperature and remaining season are suitable. Plant smaller batches at planned intervals or replace a finished crop with a different seasonal crop. Stop when insufficient growing time remains.
How can a small vegetable garden look attractive?
Use consistent bed materials, clean paths, stable supports, repeated herbs or flowers, and clearly defined crop zones. Avoid decorative objects that block access. These small-garden design principles can be explored further in the guide to small garden design tips.
Start With One Plan and Improve It Each Season
The best small vegetable garden layouts are not the ones with the most labels. They are the ones you can maintain without stepping into the soil, fighting overgrown plants, or dragging equipment through fragile crops.
Choose the plan closest to your available footprint, map the actual sun and water route, and replace the example crops with locally suitable varieties you enjoy eating. Begin with fewer crops than the drawing appears able to hold, then use your notes to adjust spacing and timing next season.
Once the layout is marked, confirm planting dates and mature spacing before buying seeds or transplants. A clear, reachable plan gives every later gardening decision a stronger foundation.
Sources and Further Reading
- University of Maryland Extension: How to Start a Vegetable Garden — beginner garden size, garden types, crop selection, and planning considerations.
- University of Maryland Extension: Planning a Vegetable Garden — choosing among in-ground beds, raised beds, containers, slopes, and vertical systems.
- University of Maryland Extension: Growing Vegetables in Raised Beds — common bed dimensions, paths, soil compaction, benefits, and limitations.
- University of Minnesota Extension: Raised Bed Gardens — sunlight, access, width, materials, soil, and watering considerations.
- University of Illinois Extension: Pick Your Technique — vertical cropping, succession planting, and intercropping in limited space.
- University of Maryland Extension: Vegetable Succession and Companion Planting — staggered sowing and reusing space after crops finish.
- University of Illinois Extension: Plan Now for a Season of Success — spacing, yield, plant health, and the risks of crowding.