How to Build a Simple Gravel Fire Pit Area on a Budget in 8 Steps
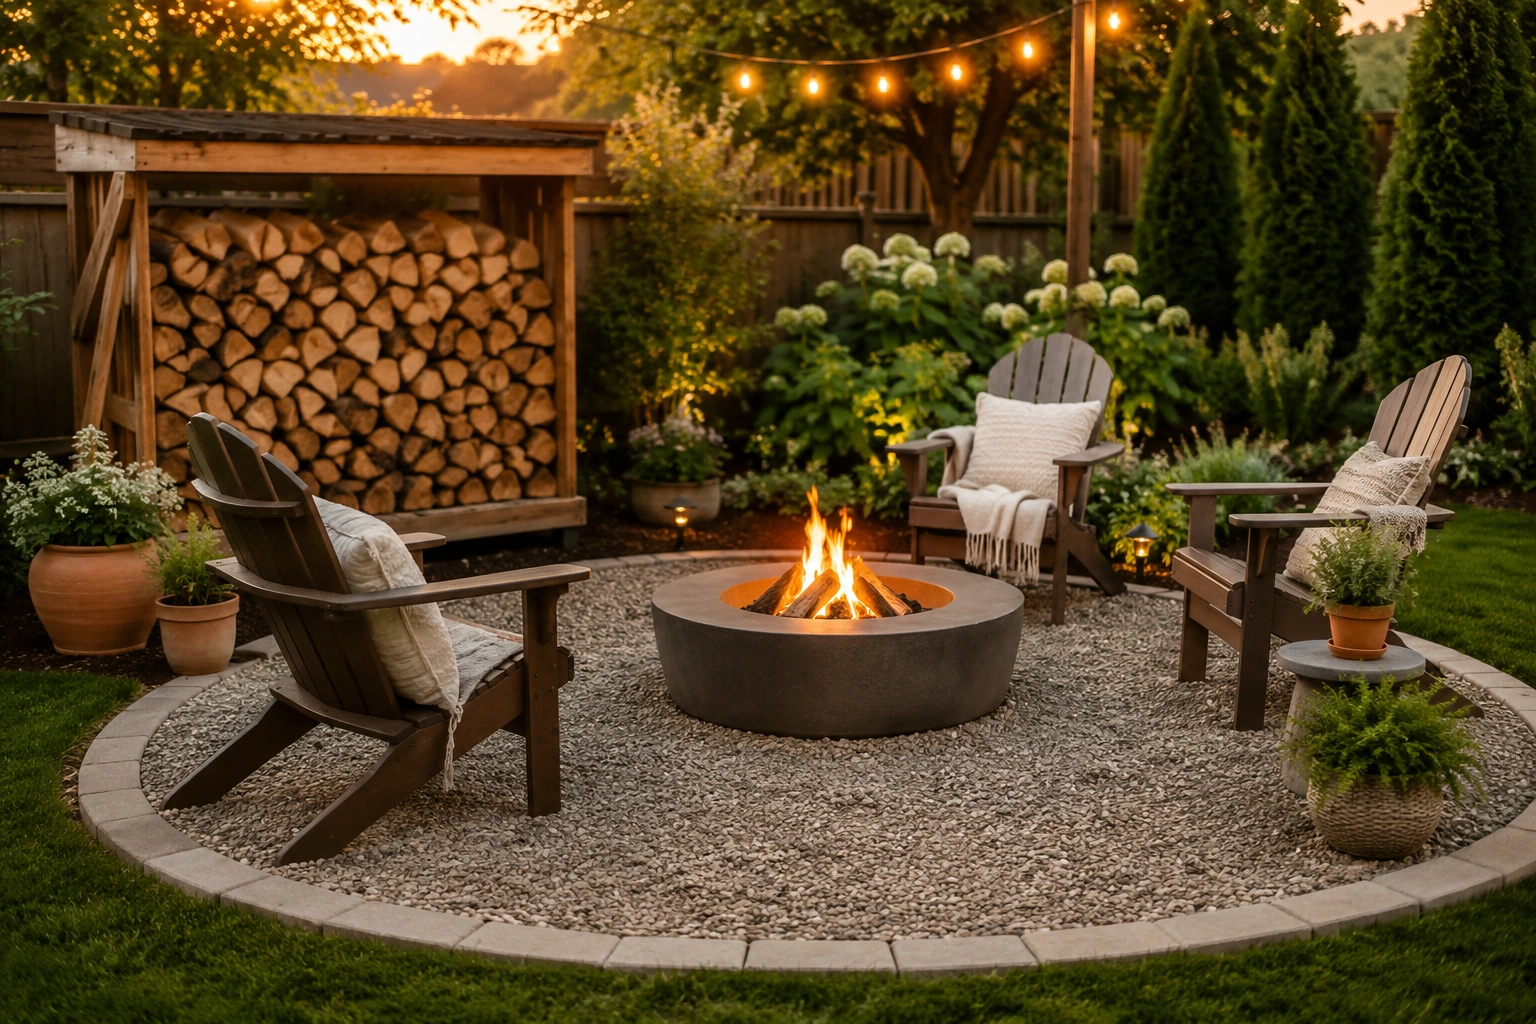
A simple gravel fire pit area is one of the easiest ways to turn a plain backyard into a cozy outdoor gathering space without spending a lot of money.
You do not need a full patio, a luxury outdoor kitchen, or a complicated landscaping project to make your yard feel warm and inviting. With a safe location, gravel base, a fire pit, a few chairs, and simple lighting, you can create a backyard space that feels finished, useful, and relaxing.
This is the kind of DIY project I like for beginners because it gives you a big visual change without needing advanced building skills.
A gravel fire pit area can work in a small backyard, a side yard, a garden corner, or an open outdoor space that needs a purpose.
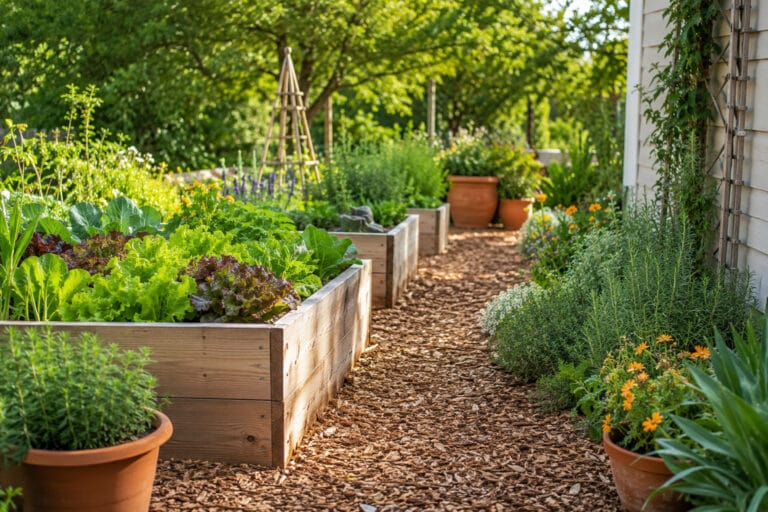
It also fits beautifully with other simple backyard upgrades like DIY Garden Projects on a Budget, Simple Garden Pathway Ideas on a Budget, and Small Garden Design Tips.
Before we start, there is one important safety note.
A fire pit should always be used outdoors, placed at least 10 feet away from the house or anything that can burn, and watched the entire time it is in use. If you are using a wood-burning fire pit, a metal spark screen helps reduce flying sparks.
Also, gravel is for the surrounding fire pit area, not for the hottest inside part of the fire pit. Some stones can hold moisture and become dangerous under extreme heat. Use a proper fire pit bowl, fire-rated insert, or manufacturer-approved materials for the actual fire area.
Table of Contents
Why Build a Gravel Fire Pit Area?
A gravel fire pit area is simple, practical, and beginner-friendly.
It gives your backyard a clear purpose without the cost of a full patio. Instead of placing chairs randomly on the grass, you create a dedicated outdoor room where people can sit, talk, relax, and enjoy cool evenings.
Gravel is also a good material for this type of project because it is usually more affordable than pavers, concrete, or stone patios.
A simple gravel fire pit area can help you:
- Create a cozy backyard gathering space
- Cover muddy or unused ground
- Make a fire pit feel intentional
- Add seating without building a full patio
- Improve your backyard on a budget
- Create a weekend DIY project
- Make your outdoor space more useful
This project is especially good if you want a backyard upgrade that feels satisfying but not overwhelming.
If you are building your outdoor space one project at a time, this pairs well with Simple Garden Pathway Ideas on a Budget because a path leading to the fire pit makes the whole area feel more finished.
Before You Start: Fire Pit Safety Basics
A fire pit area should be beautiful, but it also needs to be safe.
Before buying materials or digging into the ground, check your local rules. Some cities, neighborhoods, and HOAs have restrictions on open fires, fire pit size, fuel type, distance from structures, and burn bans.
Do not skip this step.
A safe fire pit setup starts with these basics:
- Place the fire pit outdoors only.
- Keep it at least 10 feet away from the house or anything that can burn.
- Keep it away from fences, sheds, trees, dry grass, dry leaves, and overhanging branches.
- Do not place it under covered patios, pergolas, low branches, or string lights.
- Use a stable, level, nonflammable surface.
- Watch the fire the entire time.
- Keep children and pets away from the flames.
- Use a metal spark screen over wood-burning fires.
- Keep water, a hose, or a fire extinguisher nearby.
- Put the fire out completely before leaving the backyard.
The gravel in this project is for the area around the fire pit, not inside the hottest part of the fire itself.
For the actual fire, use a proper fire pit bowl, fire-rated insert, or a fire pit product designed for heat. Do not fill the burn area with regular gravel, pea gravel, river rock, or random stones.
Some stones can hold moisture, crack, pop, or become dangerous when exposed to extreme heat.
Safety is not the boring part of the project.
It is what makes the cozy part possible.
Best Place to Put a Fire Pit Area
The best place for a gravel fire pit area is open, level, and away from anything flammable.
Look for a spot that is:
- Away from the house
- Away from fences and sheds
- Away from dry plants and trees
- Away from low branches
- Not directly under power lines or string lights
- Easy to reach from the house
- Big enough for safe seating
- Not in a low muddy area
- Not blocking garden paths or walkways
Think about how people will move around the fire pit.
You need space for chairs, walking, carrying firewood, and safely moving away from the heat.
A good beginner size is usually around 10 to 14 feet wide, depending on your yard and the fire pit size.
If your backyard is small, keep the fire pit compact and choose fewer chairs.
If you need help making a small outdoor space feel intentional, Small Garden Design Tips can help you plan the layout before you build.
Tools and Materials You Need
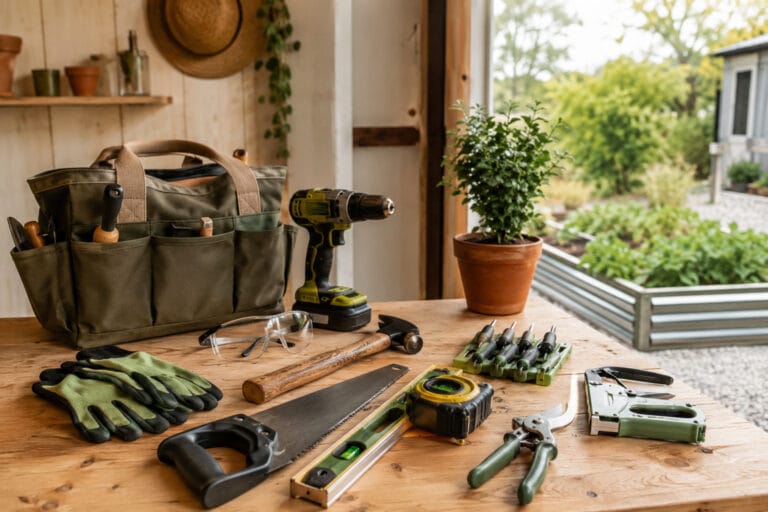
You do not need a huge tool collection for this project.
Most beginners can build a simple gravel fire pit area with basic tools and affordable materials.
Materials
- fire pit bowl
- landscape fabric
- gravel
- paver stones
- landscape edging
- outdoor chairs
- string lights
- firewood rack
- spark screen
- fire pit poker
- heat-resistant gloves
- solar pathway lights, optional
- outdoor side table, optional
Tools
- Shovel
- garden rake
- Measuring tape
- String or garden hose for layout
- Level
- tamper
- Wheelbarrow or buckets
- Utility knife
- Work gloves
- Safety glasses
You can keep this project very simple.
At minimum, you need a safe fire pit, gravel, a way to define the area, and seating.
Everything else can be added slowly.
Step 1: Choose the Fire Pit Area Size
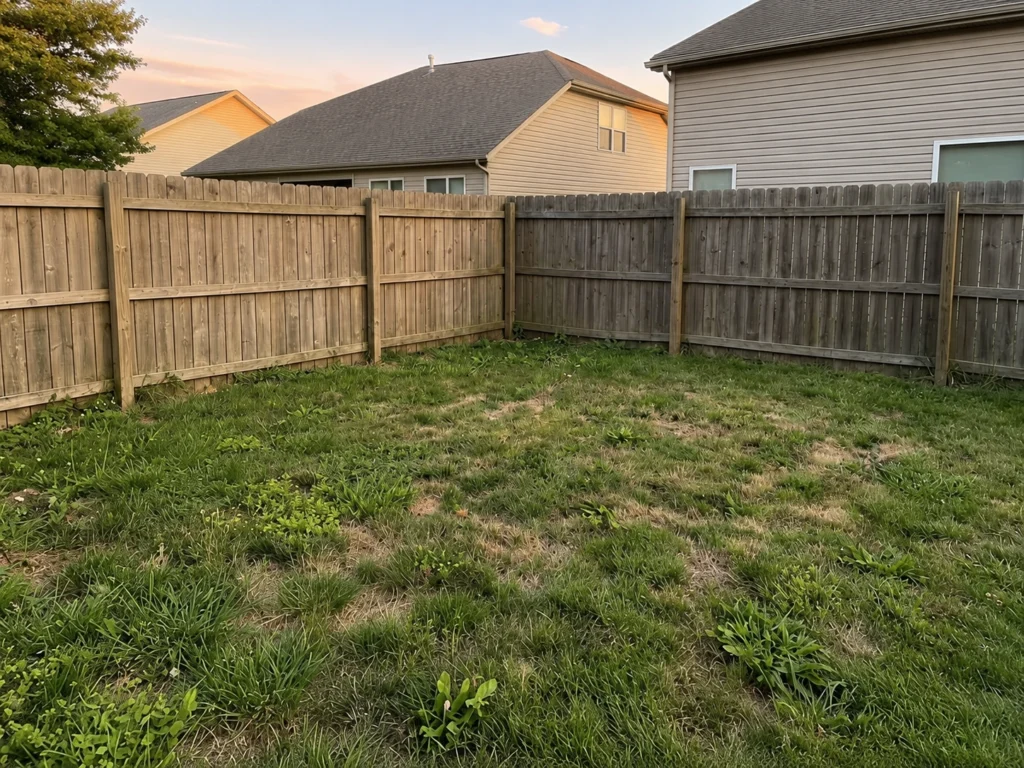
Start by deciding how large the fire pit area should be.
A small fire pit corner may only need enough space for two chairs.
A larger backyard gathering area may need room for four to six chairs.
Common beginner sizes include:
- 8 feet wide for a small fire pit corner
- 10 feet wide for two to four chairs
- 12 feet wide for four chairs
- 14 feet wide or more for a larger seating circle
Make sure the seating is not too close to the fire.
People should be able to sit comfortably without feeling too hot, and there should be enough room to walk around the chairs.
A circular gravel area feels natural around a fire pit, but a square or rectangle can be easier to mark and edge.
Choose the shape that fits your yard.
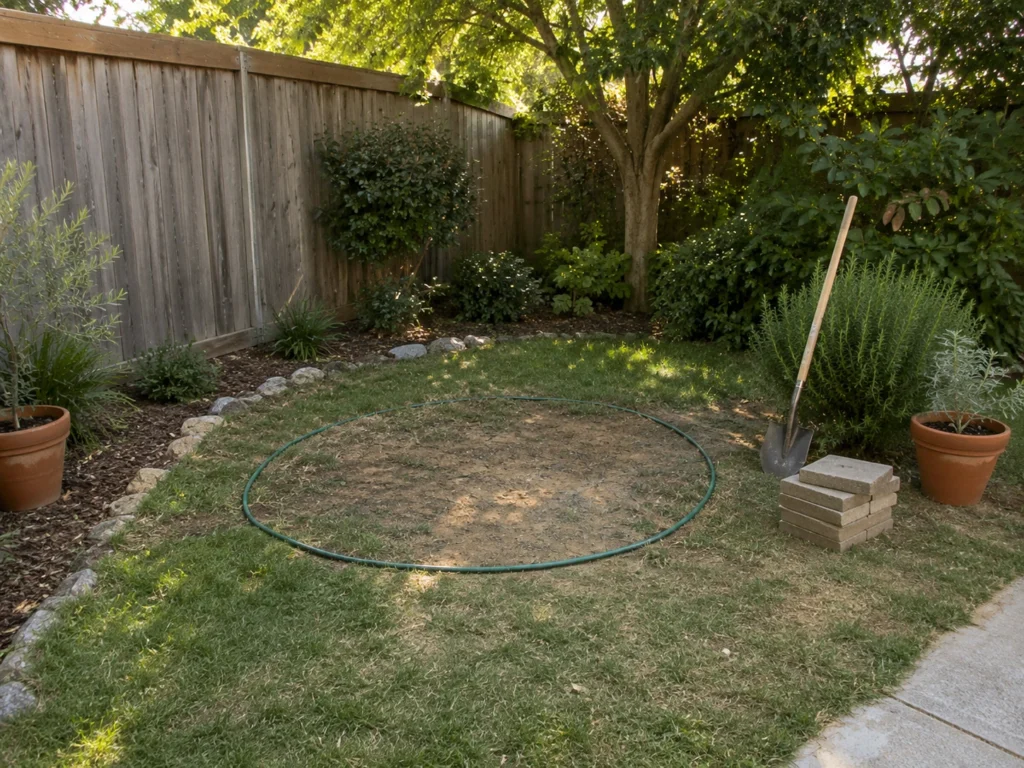
Step 2: Mark the Layout
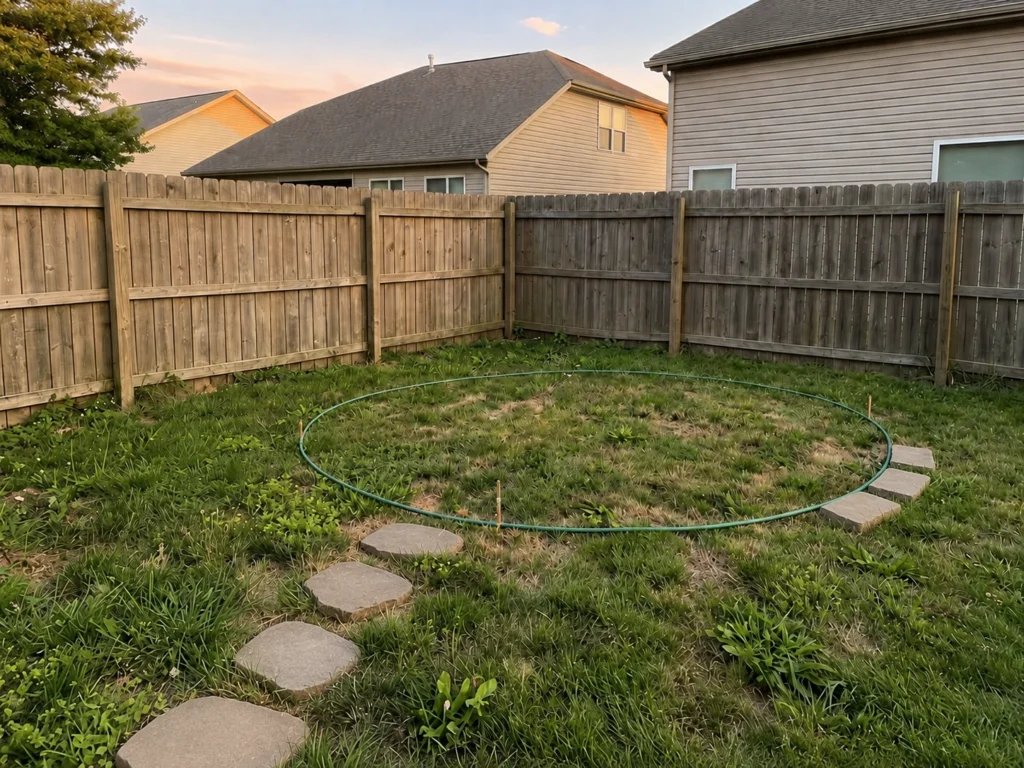
Once you choose the location and size, mark the area.
You can use:
- A garden hose
- String and stakes
- Spray marking paint
- Rope
- Paver stones placed loosely around the edge
Step back and look at the shape from different angles.
Ask yourself:
- Does it feel too big?
- Does it feel too small?
- Is it far enough from the house?
- Is there enough room for chairs?
- Is the path to the fire pit easy to walk?
- Will it connect nicely to the garden or patio?
This is the time to adjust the layout.
It is much easier to move a hose or string than to move gravel later.
If you want the area to feel more connected to the rest of the yard, plan a simple path using ideas from Simple Garden Pathway Ideas on a Budget.
Step 3: Clear the Ground
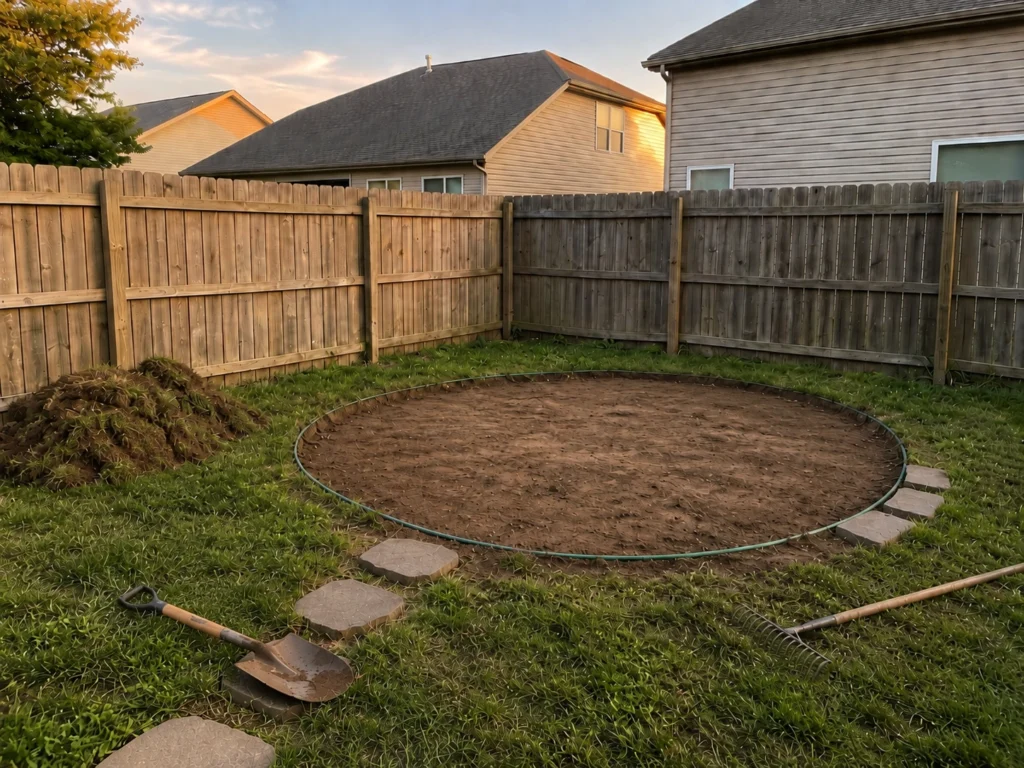
After marking the area, clear the ground.
Remove:
- Grass
- Weeds
- Roots
- Rocks
- Sticks
- Leaves
- Uneven soil
- Any flammable debris
Use a shovel to remove the top layer of grass and soil.
You do not need to dig very deep for a simple gravel fire pit area, but you do want the surface to be clean and stable.
A depth of a few inches is usually enough for a basic gravel area.
Keep the ground as even as possible.
If the area slopes badly, choose a different spot or prepare for more leveling work.
Do not build a fire pit area where water collects after rain.
A soggy fire pit area will be harder to maintain and less pleasant to use.
Step 4: Level and Compact the Area
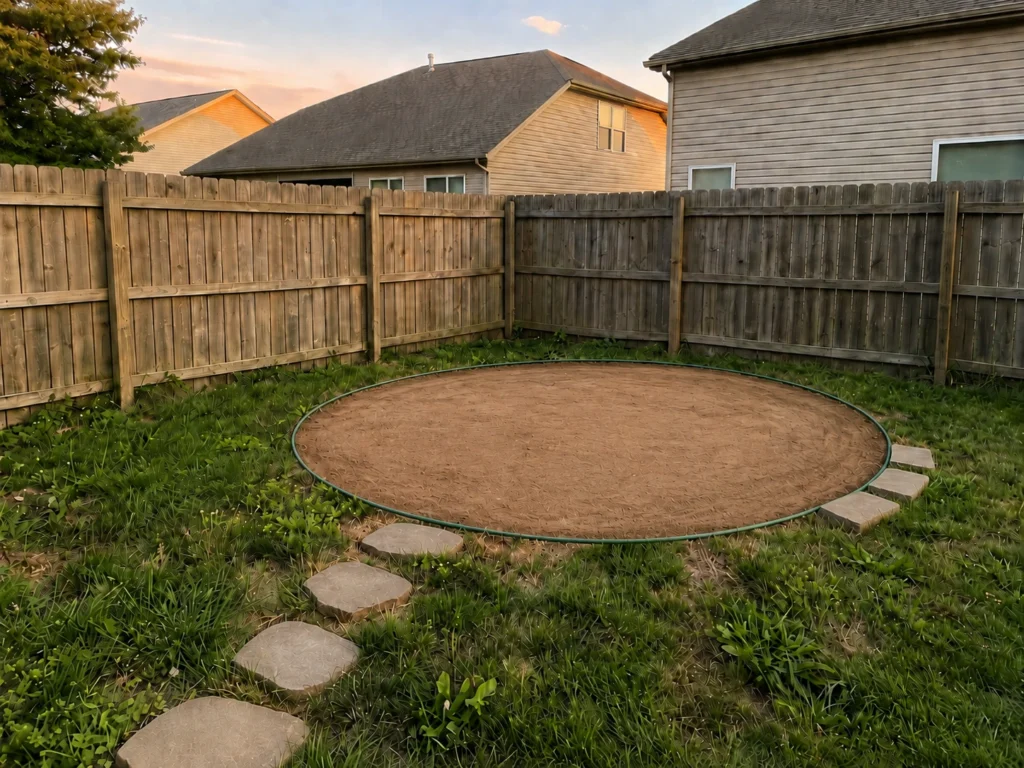
Once the ground is cleared, level the area as much as possible.
Use a rake to spread and smooth the soil.
Check the surface with a level.
It does not have to be perfect, but chairs should sit safely and the fire pit should not wobble.
After leveling, compact the soil with a tamper.
This helps create a firmer base before you add fabric and gravel.
If you skip this step, the gravel may settle unevenly, and chairs may sink into soft spots.
This is one of those small steps that makes the finished area feel better.
Step 5: Add Landscape Fabric
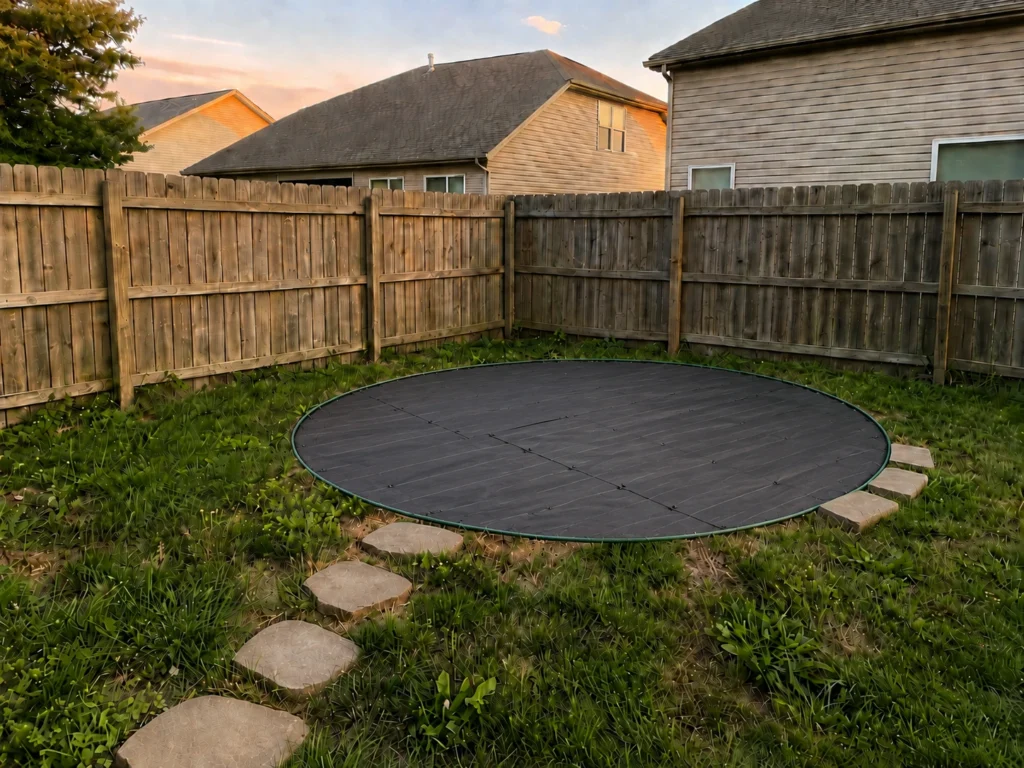
Next, roll out landscape fabric over the cleared area.
Landscape fabric helps reduce weeds and keeps the gravel from mixing into the soil too quickly.
Overlap the edges by a few inches if you need more than one strip.
Cut the fabric to fit the shape using a utility knife.
Use landscape staples if needed to hold it in place.
This step is especially helpful if you are building over an area that had grass or weeds before.
Landscape fabric will not stop every weed forever, but it makes the area easier to maintain.
Step 6: Add Gravel
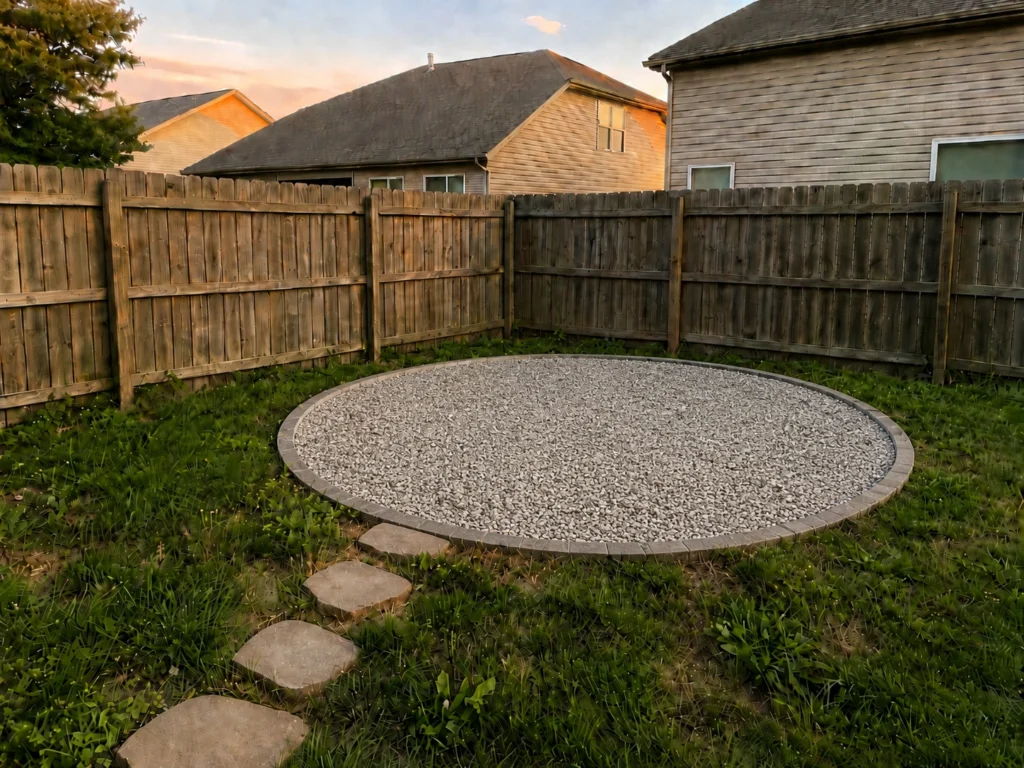
Now add the gravel.
Spread it evenly across the area with a rake.
For a simple backyard fire pit area, a 2 to 3 inch layer of gravel is usually enough for a clean walking and seating surface.
Choose gravel that works well for patios and walkways.
Avoid using pea gravel or river rocks inside the actual fire pit burn area. For the surrounding seating area, choose gravel that is comfortable enough to walk on and stable enough for chairs.
After spreading the gravel, rake it smooth.
Walk around the area and check for low spots.
Add more gravel where needed.
If you want a more finished edge, install landscape edging or use paver stones around the border.
The edging keeps gravel from spreading into the lawn or garden beds.
Step 7: Place the Fire Pit and Seating
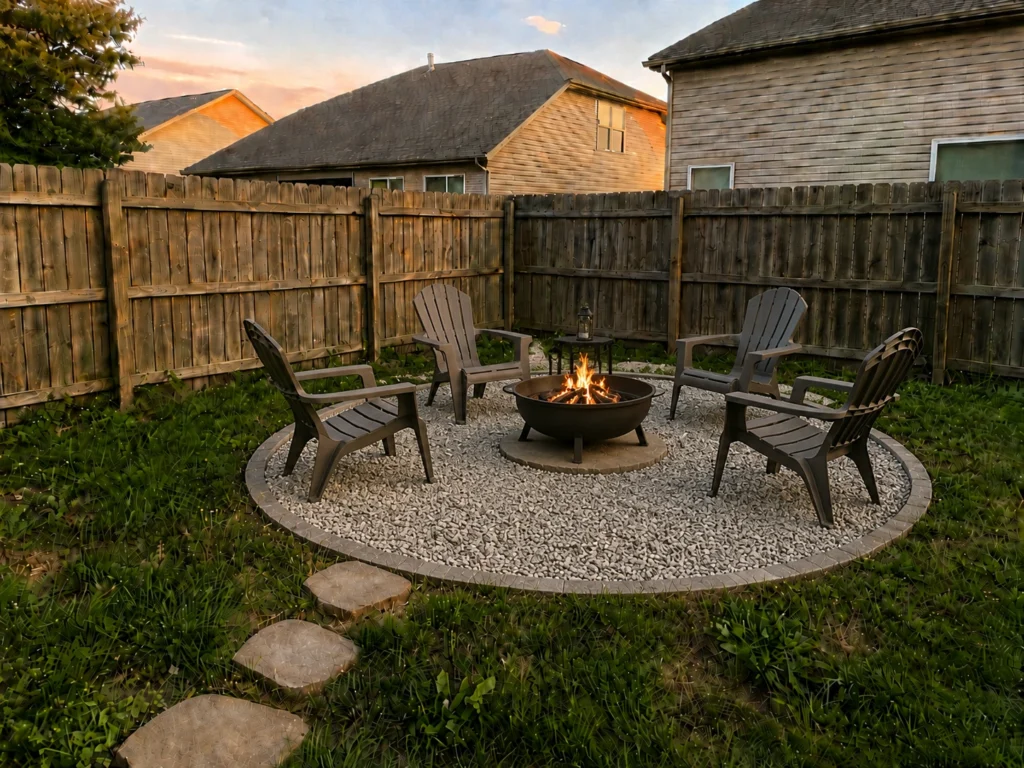
Once the gravel is level, place the fire pit in the center of the area.
A fire pit bowl is one of the easiest beginner options because it is portable, simple to set up, and does not require building a permanent stone fire pit.
Place the fire pit on a stable, level, nonflammable base.
Follow the manufacturer’s instructions for your specific fire pit.
Then arrange your outdoor chairs around it.
Good seating options include:
- Adirondack chairs
- Folding outdoor chairs
- Wooden benches
- Metal patio chairs
- Simple weather-resistant chairs
Start with the chairs you already have if you are working with a tight budget.
You can always upgrade later.
Leave enough space between the chairs and the fire pit so people can sit comfortably and move safely.
Add a small outdoor side table if you want a place for drinks, snacks, or lanterns.
Step 8: Add Cozy Finishing Touches
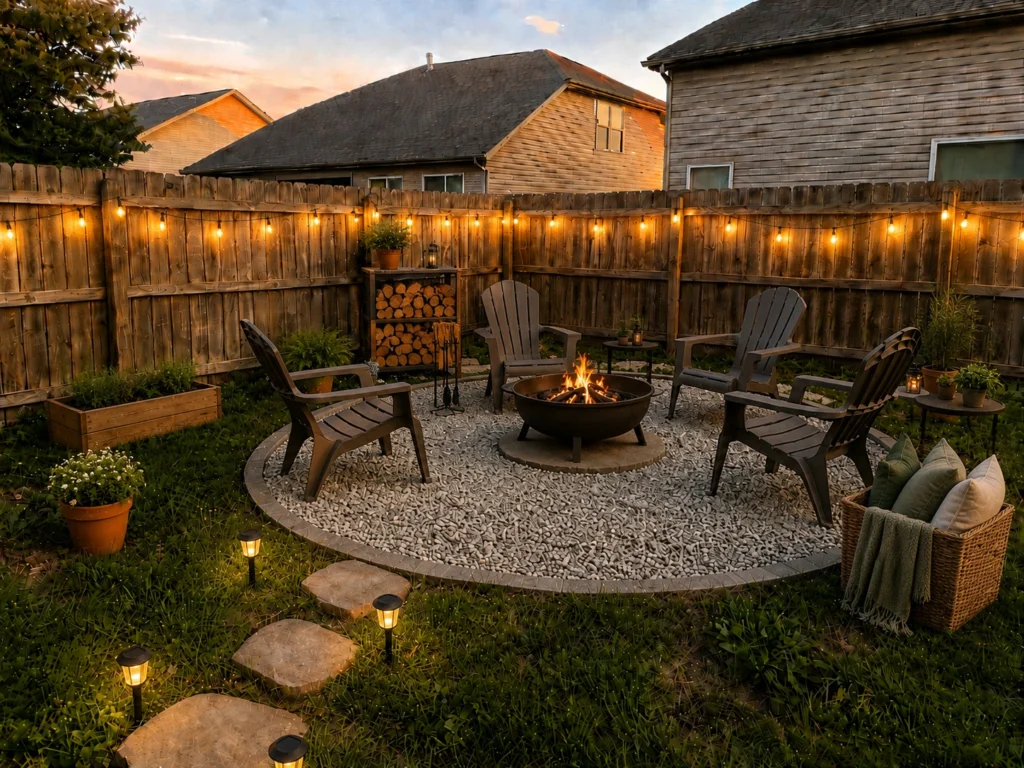
The finishing touches are what turn a gravel circle into a cozy backyard space.
You can add:
- string lights
- solar pathway lights
- firewood rack
- potted plants
- outdoor side table
- simple garden path
- natural wood accents
- cushions stored safely away from flames
- small herb planters nearby
A firewood rack keeps wood organized and makes the area look more intentional.
A fire pit poker and heat-resistant gloves are useful for managing a wood fire safely.
If you add string lights, keep them far away from the fire pit and never hang them directly over the flame.
Lighting should create atmosphere without becoming a safety problem.
Potted plants can soften the edges, but keep dry plants, mulch, and flammable decor away from the fire.
This is where you can connect the fire pit area to your garden style.
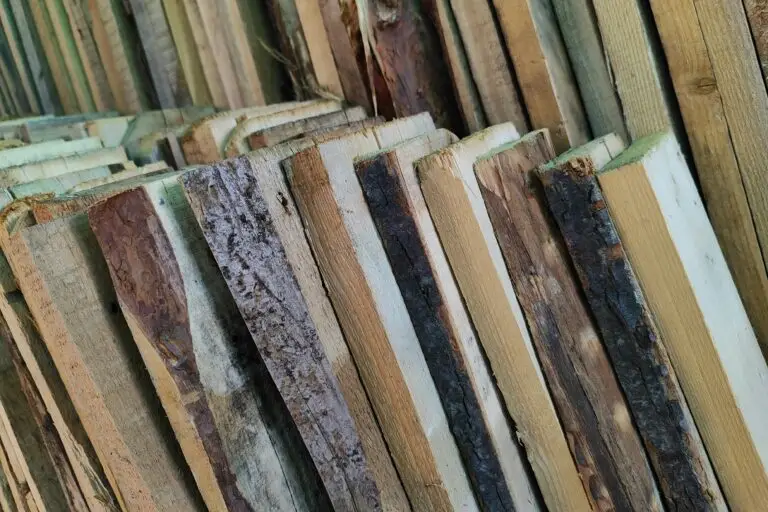
If you are choosing wood elements like benches, borders, or storage pieces, Best Wood for Garden Projects can help you choose materials that work better outdoors.
Budget Tips for a Gravel Fire Pit Area
A fire pit area can become expensive quickly if you try to buy everything at once.
The best budget approach is to build the base first and upgrade slowly.
Start With the Essentials
The essentials are:
- Safe location
- Gravel base
- Fire pit
- Seating
- Basic safety tools
You do not need every decorative item on the first day.
Use Simple Seating First
Start with chairs you already own.
Upgrade to matching outdoor chairs later.
This keeps your first project affordable.
Choose Gravel Over a Full Patio
Gravel is usually cheaper than building a full paver patio.
It also feels more relaxed and fits a homesteading backyard style.
Add Pavers Only Where Needed
Use paver stones as edging, a small landing area, or a path instead of paving the entire space.
This gives you a finished look without the full cost.
Build in Phases
Phase 1: Gravel area, fire pit, basic chairs
Phase 2: Edging, path, side table
Phase 3: Lighting, firewood rack, landscaping
Phase 4: Better seating and decor
A phased approach keeps the project realistic.
Watch for Sales
Fire pits, outdoor chairs, and string lights often go on sale at the end of outdoor season.
Plan ahead and buy slowly.
Before and After Backyard Transformation Ideas
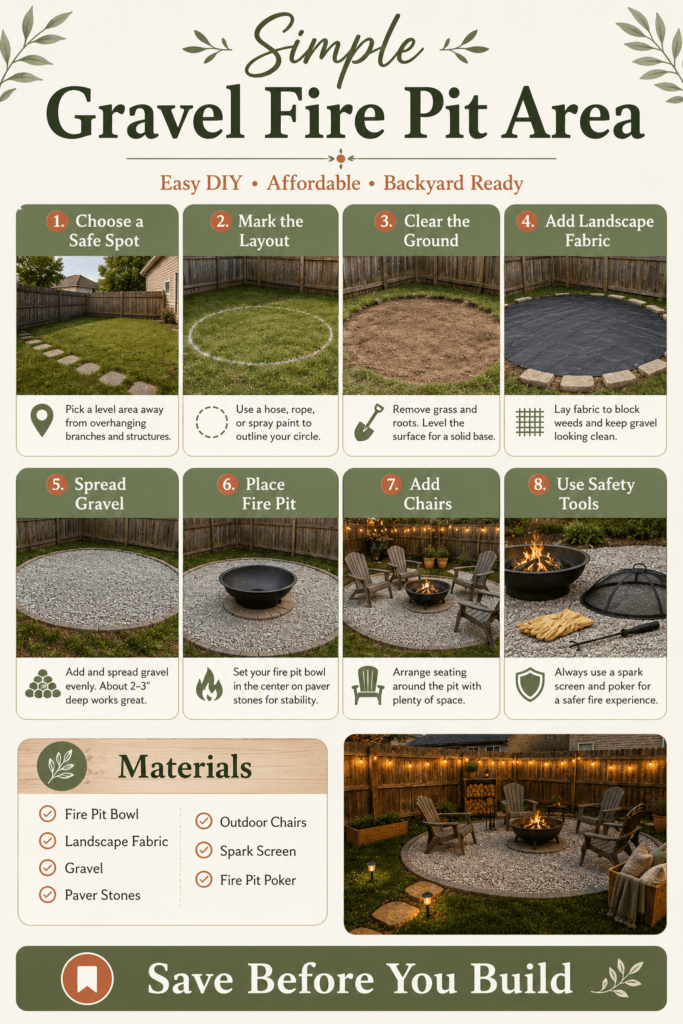
A simple gravel fire pit area is a great before-and-after project.
Before, you may have:
- Empty grass
- A muddy corner
- Random chairs
- No outdoor gathering space
- An unused backyard area
- A fire pit sitting without a real setup
After, you can have:
- A defined gravel seating area
- Cozy chairs around a fire pit
- A clean path leading to the space
- Organized firewood
- Soft lighting
- A backyard that feels useful and inviting
This is why the project works so well for Pinterest.
People love simple transformations they can imagine in their own yard.
You can take photos at each stage:
- Empty area before
- Marked layout
- Cleared ground
- Landscape fabric
- Gravel added
- Fire pit and chairs placed
- Finished cozy evening setup
These photos can become multiple Pinterest pins, not just one.
Common Mistakes to Avoid
Placing the Fire Pit Too Close to the House
Keep the fire pit at least 10 feet away from the home or anything that can burn.
More distance is better when space allows.
Forgetting Local Rules
Always check local rules, burn bans, HOA restrictions, and fire regulations before building or using a fire pit.
Using Gravel Inside the Fire Pit
Gravel is for the surrounding fire pit area.
Do not use regular gravel, pea gravel, river rock, or random stones inside the hottest burn area.
Use a proper fire pit bowl, fire-rated insert, or approved fire pit materials.
Skipping the Base Preparation
If you do not clear, level, and compact the area, the gravel may settle unevenly.
Take the time to prepare the base.
Making the Area Too Small
Chairs need space.
People need to walk safely.
Do not make the seating area so tight that people are too close to the fire.
Hanging String Lights Too Close
String lights look beautiful, but they should never be placed where heat or sparks can reach them.
Keep lighting safely away from the fire pit.
Leaving the Fire Unattended
Never leave a fire pit burning without supervision.
Put the fire out completely before going inside.
Forgetting Safety Tools
Keep a spark screen, fire pit poker, heat-resistant gloves, water source, hose, or fire extinguisher nearby.
Simple Gravel Fire Pit Area Checklist
Use this checklist before you start.
Planning
- Check local fire rules
- Choose a safe outdoor location
- Keep at least 10 feet from anything that can burn
- Avoid low branches and covered areas
- Decide on size and shape
- Plan seating space
- Plan a path if needed
Materials
- fire pit bowl
- landscape fabric
- gravel
- paver stones
- landscape edging
- outdoor chairs
- string lights
- firewood rack
- spark screen
- fire pit poker
- heat-resistant gloves
Tools
- Shovel
- Rake
- Measuring tape
- Level
- tamper
- Utility knife
- Wheelbarrow
- Gloves
- Safety glasses
Finishing Touches
- Firewood storage
- Side table
- Solar lights
- Potted plants
- Garden path
- Simple seating
- Safe fire tools
FAQ About Building a Simple Gravel Fire Pit Area
Is gravel good for a fire pit area?
Yes, gravel can work well for the surrounding fire pit seating area because it is affordable, simple to install, and helps create a clean outdoor space.
Use gravel around the fire pit, not inside the hottest burn area.
Can I put a fire pit directly on gravel?
A portable fire pit can often sit on a stable nonflammable gravel area, but you should always follow the manufacturer’s instructions.
Make sure the fire pit is stable, level, and designed for outdoor use.
What gravel is best for a fire pit area?
Choose gravel that works well for walkways or patios.
Avoid using pea gravel or river rock inside the actual fire pit because some stones can retain moisture and become dangerous under extreme heat.
How big should a gravel fire pit area be?
A small area can be around 8 to 10 feet wide.
A more comfortable seating area is often 12 to 14 feet wide, depending on your fire pit and number of chairs.
Do I need landscape fabric under gravel?
Landscape fabric is helpful because it reduces weeds and keeps gravel from mixing into the soil too quickly.
It is not required, but it makes the area easier to maintain.
How deep should the gravel be?
A 2 to 3 inch layer of gravel is usually enough for a simple seating area.
Add more if needed for low spots or better coverage.
Can I build a gravel fire pit area on grass?
Yes, but you should remove the grass first, level the ground, compact the soil, add landscape fabric, and then spread gravel.
What should I put around a fire pit?
Good options include gravel, pavers, stone, metal edging, outdoor chairs, side tables, solar lights, and safe landscaping placed away from flames.
What should I not put near a fire pit?
Do not place dry mulch, dry plants, cushions, wood decor, firewood stacks, fences, sheds, low branches, or string lights too close to the fire pit.
Is this a good beginner DIY project?
Yes, a simple gravel fire pit area is a good beginner DIY project because it uses basic tools, affordable materials, and simple steps.
It is also easy to improve over time.
Final Thoughts
A simple gravel fire pit area can completely change the way your backyard feels.
It gives you a place to sit, relax, talk, enjoy cool evenings, and make your outdoor space feel more intentional.
You do not need a big budget to start.
Choose a safe location. Clear the ground. Add landscape fabric. Spread gravel. Place a proper fire pit. Add simple seating. Then improve the space slowly with lighting, a firewood rack, a path, and soft landscaping.
Start with the basics.
Keep safety first.
Build the cozy details over time.
That is how a plain backyard corner can become one of your favorite places at home.