DIY Small Fountain: A Simple Way to Transform Your Garden Corner
DIY small fountain projects are one of the easiest ways to make a garden, patio, balcony, or backyard corner feel more peaceful and finished. You do not need a large pond, expensive landscaping, or professional tools to enjoy the relaxing sound of moving water at home.
A small fountain can be as simple as a waterproof container, a small submersible pump, a few stones, and clean water. With the right setup, even a plain outdoor corner can become a calm focal point where you can relax, listen to the water, and make the space feel more intentional.
This project is also beginner-friendly because you can adjust it to your space and budget. You can make a small container fountain for a patio, a ceramic pot fountain for a balcony, a bowl fountain for a modern garden, or a natural rock-style fountain for a backyard bed.
In this guide, you will learn how to make a DIY small fountain step by step, what materials you need, where to place it, how to keep it safe, and how to avoid common beginner mistakes.
Disclosure: This post contains affiliate links. As an Amazon Associate, I earn from qualifying purchases. This means I may earn a small commission if you buy through my links, at no extra cost to you.
Why Make a DIY Small Fountain?
A small fountain can completely change the feeling of an outdoor space. The sound of bubbling water makes a garden feel calmer, softer, and more alive. Even if your backyard is small, a fountain can create the feeling of a peaceful garden corner without requiring a large pond or expensive installation.
One of the best things about a DIY small fountain is that it works in many different spaces. You can place one on a patio, balcony, front porch, courtyard, small backyard, or even beside a raised garden bed. It does not need to take up much room.
A small fountain can help you:
- Add relaxing water sound to your garden
- Make a plain corner feel finished
- Create a peaceful seating area
- Add beauty without building a pond
- Bring movement into a still garden space
- Attract birds and small wildlife
- Improve a patio or balcony
- Create a weekend garden project on a budget
A small fountain is one of those garden ideas on a budget that can make an outdoor space feel more relaxing without a full landscaping project. Instead of redesigning the whole yard, you can create one beautiful focal point and build around it over time.
Best Types of DIY Small Fountains
Before you start building, it helps to decide what kind of fountain fits your space. The best design depends on your budget, style, available power, and where you want to place it.
1. Container Fountain
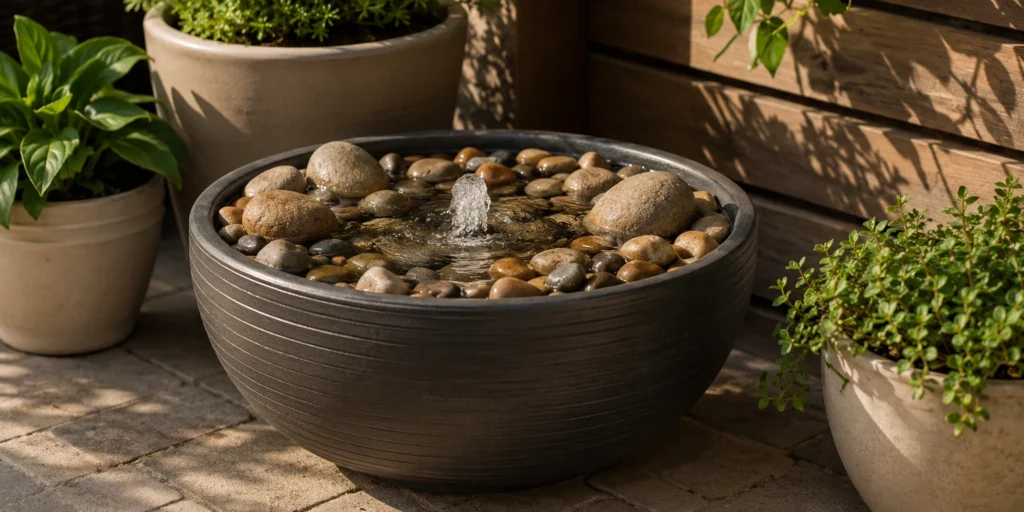
A container fountain is the easiest option for beginners. It uses a waterproof bowl, planter, tub, or pot as the base. A small pump sits inside the container and moves the water.
This style is perfect for patios, balconies, small gardens, and renters because it does not require digging. It is also easy to move if you need to change the layout later.
2. Ceramic Pot Fountain
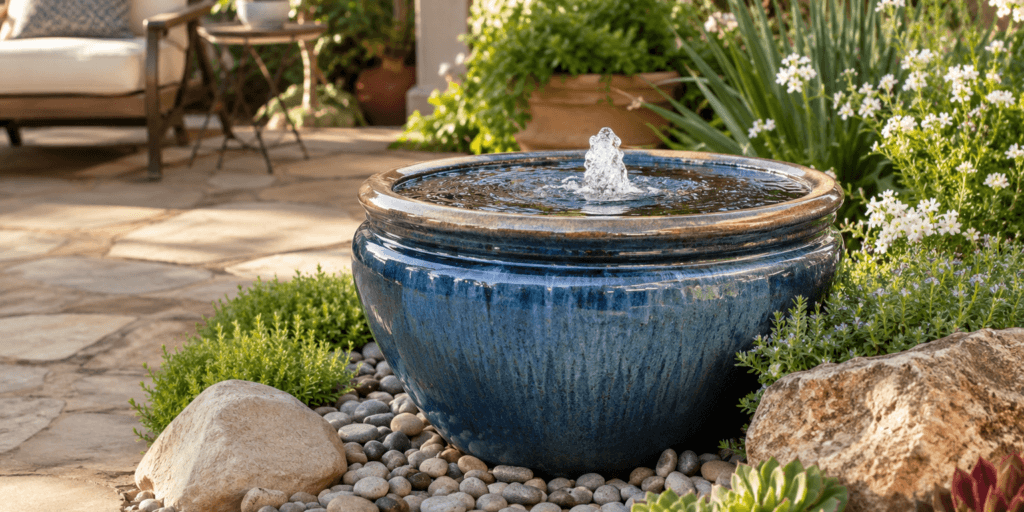
A ceramic pot fountain is a beautiful choice if you want the project to feel decorative. A glazed pot or large ceramic bowl can become the main visual feature.
This style works well near outdoor seating, garden paths, or patio doors. Choose a pot color that matches your garden style. Terracotta, cream, dark green, blue, and neutral stone colors all work well.
3. Bowl Fountain
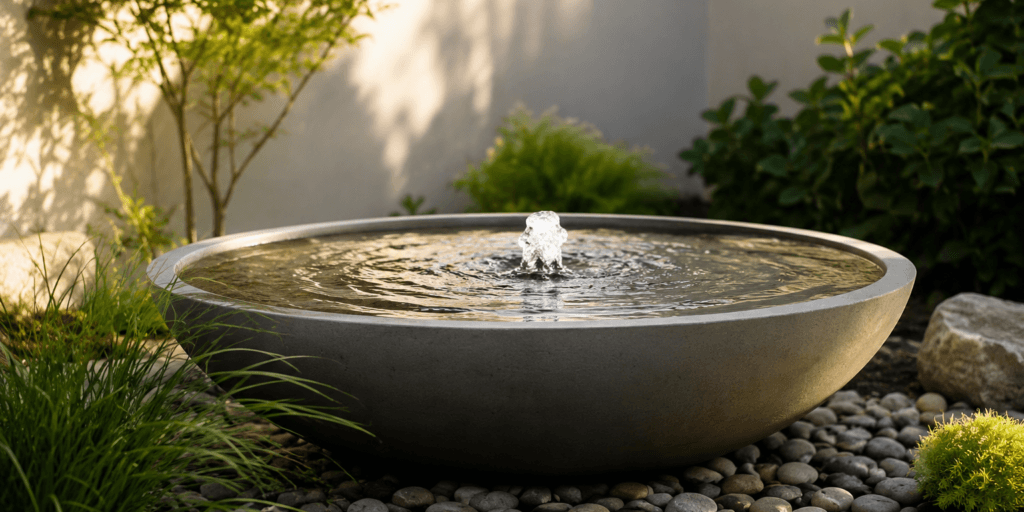
A bowl fountain is simple, clean, and elegant. It usually uses a wide shallow bowl with a pump in the center. Water bubbles gently and falls back into the bowl.
This is a good option for modern gardens, small patios, and spaces where you want a calm look without too many decorations.
4. Rock Fountain
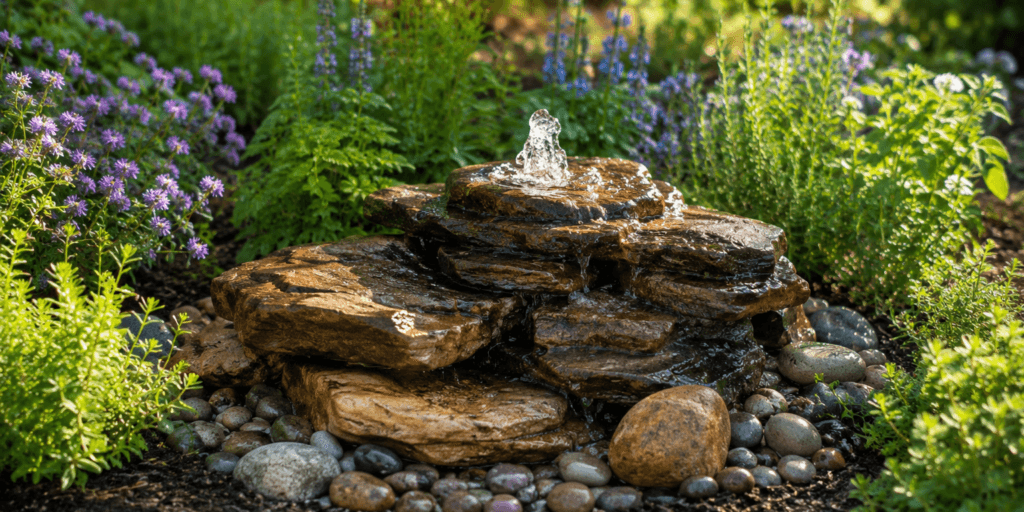
A rock fountain creates a more natural garden look. Stones and pebbles are arranged around the pump so the water appears to bubble through the rocks.
This style works well in backyard beds, cottage gardens, and rustic outdoor spaces. It can look very natural when surrounded by herbs, flowers, mulch, or gravel.
5. Solar Fountain
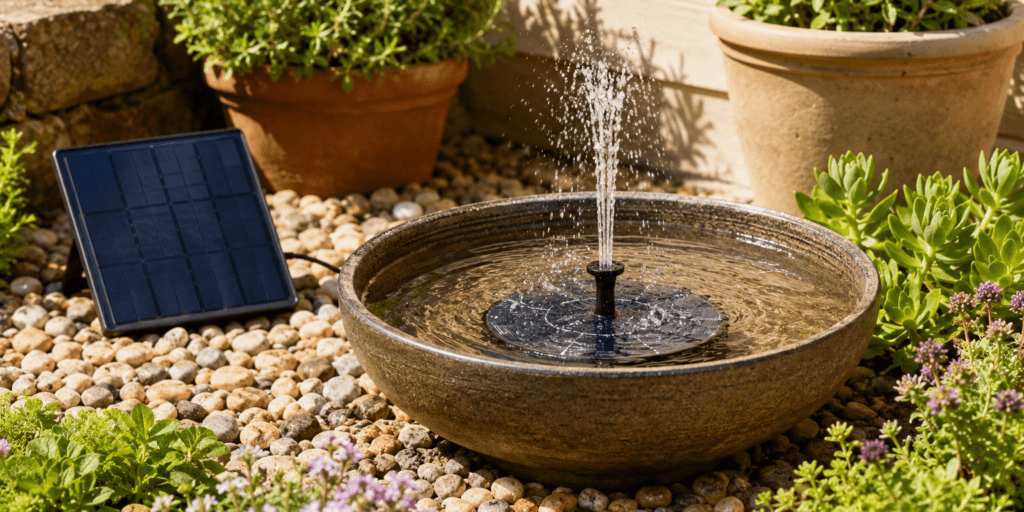
A solar fountain uses a solar-powered pump instead of an electric pump. This is useful if you do not have an outdoor outlet nearby.
Solar fountains are simple and budget-friendly, but the water flow depends on sunlight. On cloudy days or in shade, the fountain may run weakly or stop.
6. Mini Pond Fountain
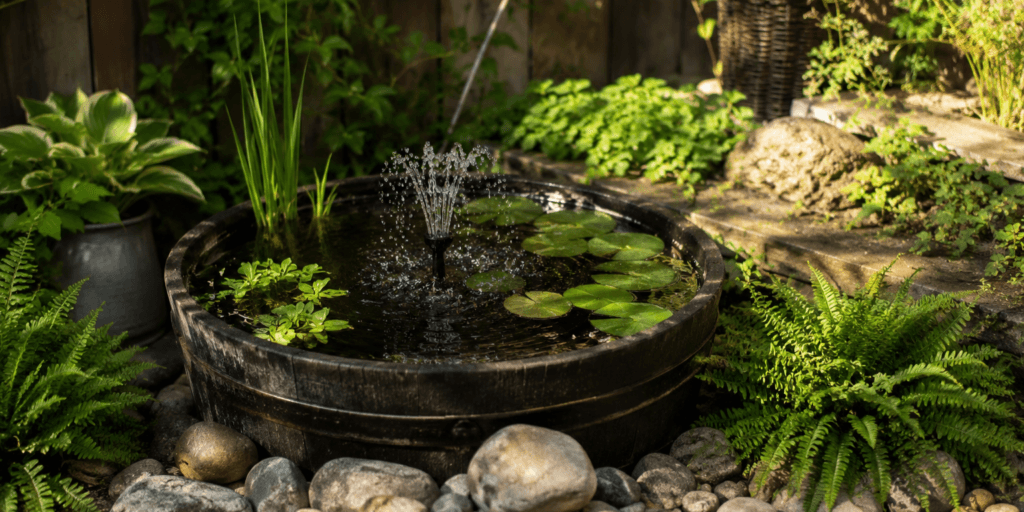
A mini pond fountain is a small water feature that can include aquatic plants. It usually uses a tub, barrel, or large container with a small pump.
This is a good option if you want a softer, more natural look with water plants. It needs a little more maintenance than a simple bubbling fountain, but it can be beautiful in a small garden corner.
What You Need to Make a DIY Small Fountain
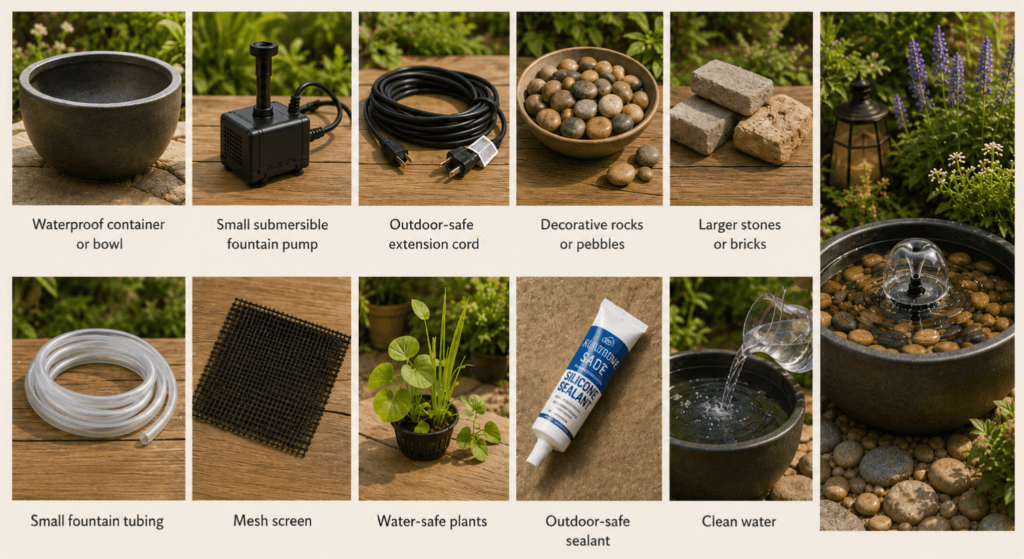
A DIY small fountain does not require many materials. The basic idea is simple: a container holds water, a pump moves the water, and stones or decorations hide the pump.
Materials
You will need:
- Large waterproof container, bowl, pot, or tub
- Small submersible fountain pump
- Outdoor-safe extension cord if needed
- Decorative rocks or pebbles
- Larger stones or bricks for support
- Small fountain tubing if your pump requires it
- Mesh screen, optional
- Water-safe plants, optional
- Outdoor-safe sealant, optional
- Clean water
Tools
Helpful tools include:
- Gloves
- Scissors or utility knife
- Small shovel if placing the fountain in a garden bed
- Level, optional
- Bucket or watering can
For the simplest version, you only need a waterproof container, a small pump, stones, and water. You can always add more styling later.
How to Choose the Right Container
The container is the base of your fountain, so choose carefully. It needs to hold water without leaking, and it should be large enough to cover the pump completely.
Good container options include:
- Glazed ceramic bowl
- Large sealed planter
- Resin bowl
- Metal tub
- Stone-look container
- Sealed concrete bowl
- Half barrel with liner
- Large waterproof basin
Avoid unsealed terracotta or porous clay containers unless you seal them first. These materials can absorb water and may leak over time.
If you want the fountain to look beautiful, these aesthetic plant pot ideas can help you choose a container that fits your garden style. A simple pot can become a lovely fountain when it matches the colors and textures around it.
The container should be deep enough for the pump to stay fully underwater. If the pump runs dry, it can overheat or stop working.
Before building, always test the container for leaks. Fill it with water and let it sit for several hours or overnight. If the water level drops and there is no reason for evaporation, choose another container or seal it properly.
How to Choose the Right Pump
The pump is what makes the fountain work. It moves water from the container and creates the bubbling or flowing effect.
For beginners, the easiest choice is a small submersible fountain pump with adjustable flow. Adjustable flow lets you control how strong the water movement is. This is helpful because a pump that is too powerful can splash water out of the container.
When choosing a pump, think about:
- Container size
- Desired water height
- Indoor or outdoor rating
- Electric or solar power
- Adjustable water flow
- Cord length
- Ease of cleaning
For most small container fountains, a small pump is enough. You do not need a large pond pump for a small bowl or pot fountain.
An electric pump usually gives steady water flow. A solar pump is useful if you do not have electricity nearby, but it works best in direct sun.
Always follow the pump instructions. The pump should stay fully submerged while running.
Best Location for a DIY Small Fountain
Location matters. A small fountain should be easy to see, easy to maintain, and safe.
Choose a flat and stable surface. If the fountain sits unevenly, water may splash out or the container may look tilted. Use a level if needed.
Good locations include:
- Patio corner
- Garden bed edge
- Near a bench
- Beside an outdoor dining area
- Balcony corner
- Front porch
- Courtyard
- Near a garden path
If using an electric pump, place the fountain near an outdoor-safe outlet. Keep cords away from walkways so they do not become a tripping hazard.
Partial shade is often better than full sun. Too much sun can warm the water and encourage algae. Avoid placing the fountain directly under trees that drop many leaves, flowers, or seeds into the water.
If your fountain sits near vegetables or herbs, learning how to build raised garden beds can help you create a more organized backyard layout.
For balconies, be extra careful. Water, stones, and ceramic containers can become heavy. Check weight limits and make sure the fountain cannot tip over or drain water where it should not.
Step-by-Step: How to Make a DIY Small Fountain
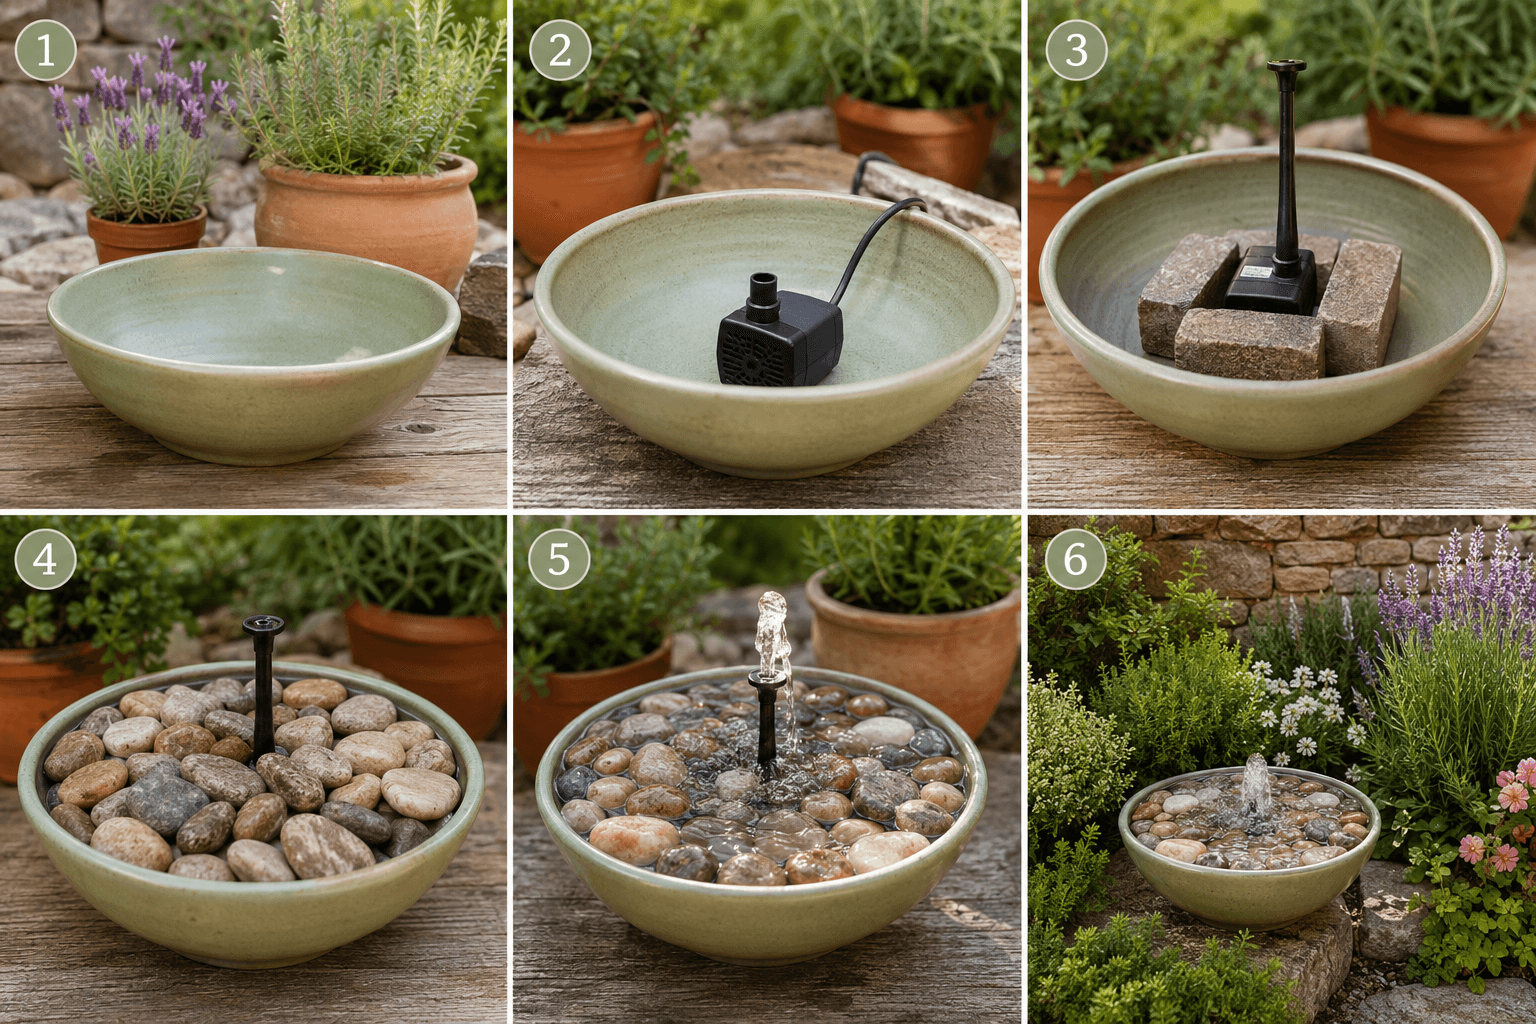
This simple method works for a container fountain, ceramic pot fountain, bowl fountain, or small rock fountain.
Step 1: Choose Your Fountain Style
Start by deciding the look you want. Do you want a rustic ceramic pot fountain, a clean modern bowl fountain, a natural rock fountain, or a small patio fountain?
A clear style helps you choose the right container, stones, and plants.
For a natural garden look, use stones, pebbles, herbs, and flowers. For a modern look, use a simple bowl and smooth black or gray stones. For a cottage look, use a glazed pot, terracotta tones, and soft flowers.
Step 2: Test the Container for Leaks
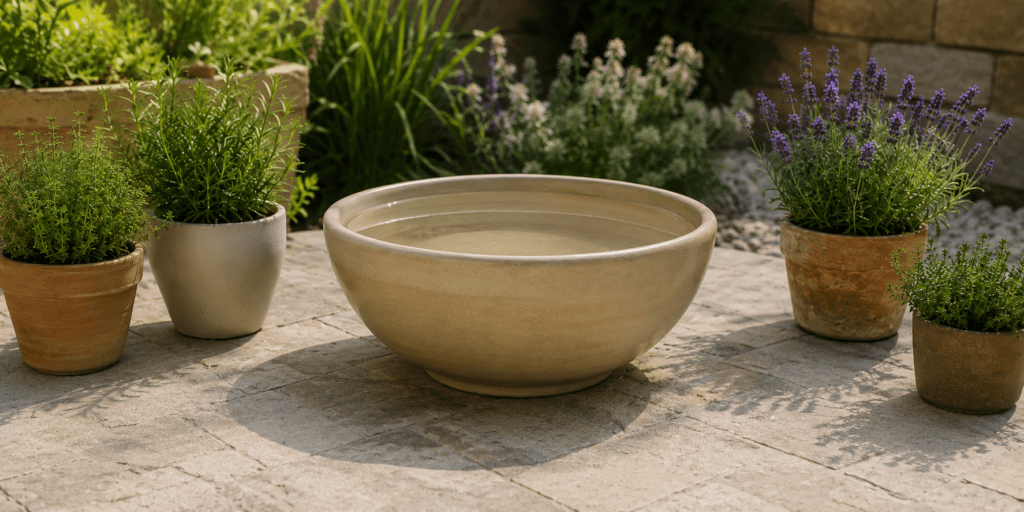
Before adding rocks and a pump, fill the container with water and let it sit.
Leave it for several hours or overnight. Check underneath and around the container for leaks. It is much easier to find problems before everything is assembled.
If the container leaks, use a different one or apply an outdoor-safe waterproof sealant if appropriate for the material.
Step 3: Place the Container
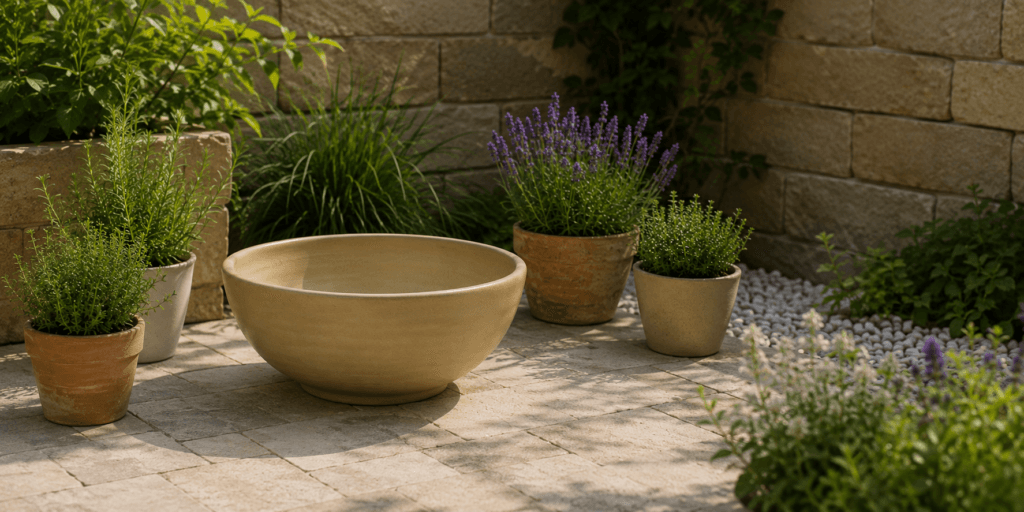
Move the empty container to its final location before adding heavy stones and water.
Once filled, the fountain can be difficult to move. Make sure the container is level, stable, and positioned where you want it.
Think about how it will look from your favorite seating area or from inside the house. A fountain is more enjoyable when you can see and hear it.
Step 4: Add the Pump
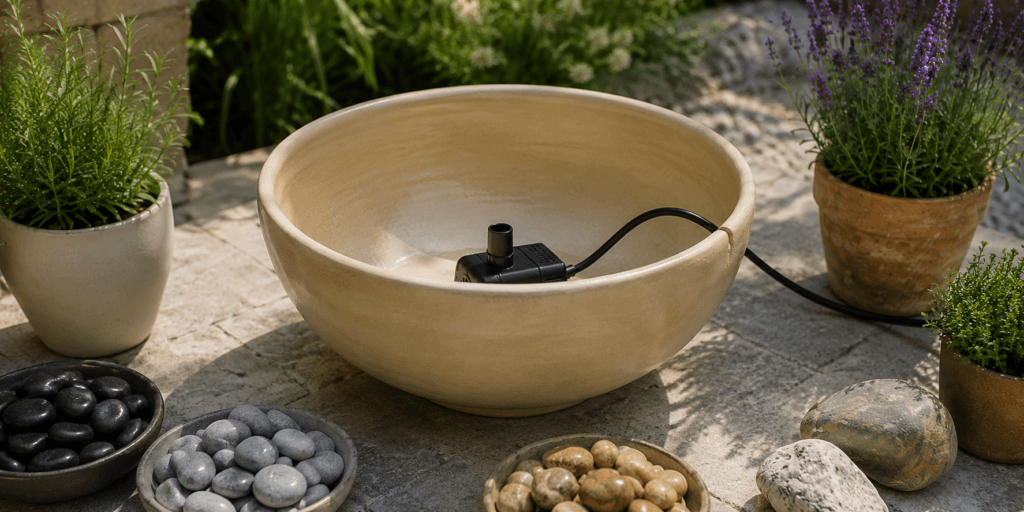
Place the submersible pump at the bottom of the container.
If the pump has suction cups, press it gently into place. If not, use stones or bricks later to keep it stable.
Make sure the cord can exit the container safely without being pinched or creating a tripping hazard.
Step 5: Attach Tubing or Fountain Head
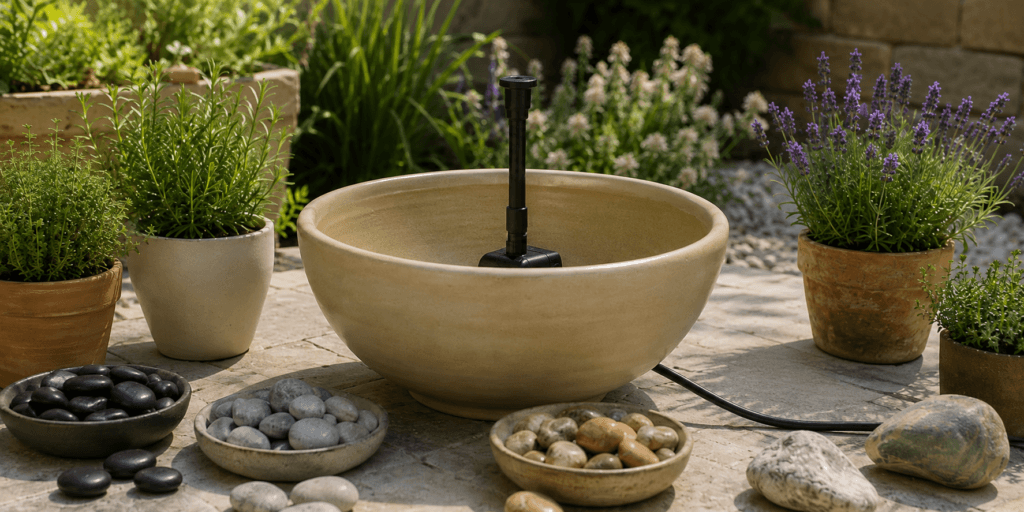
Some pumps come with a small fountain head or tube. Attach it according to the instructions.
The tube or fountain head controls where the water comes out. You may want a gentle bubbling effect rather than a tall spray, especially for a small container.
A low bubbling fountain is usually better for patios and balconies because it reduces splashing.
Step 6: Support and Hide the Pump
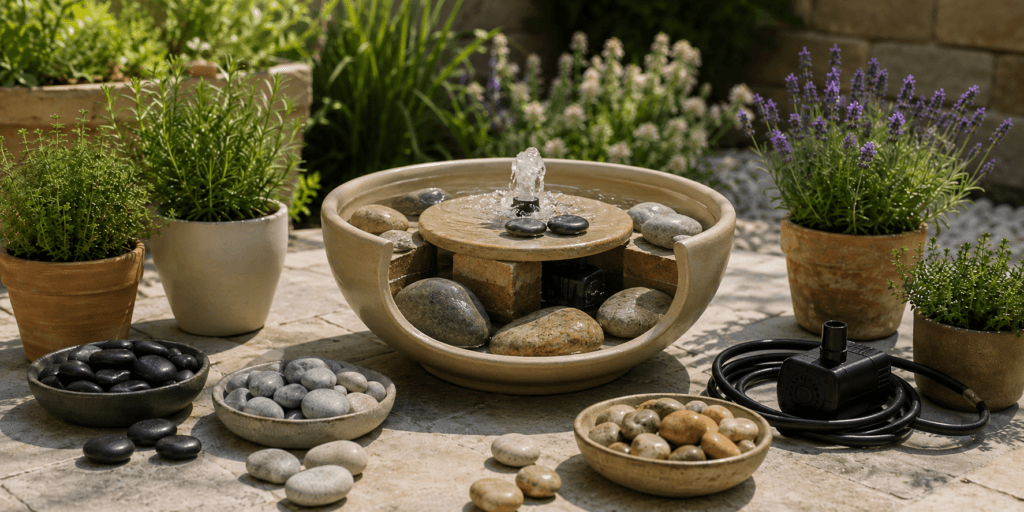
Use larger stones, bricks, or an upside-down pot to support the fountain head and hide the pump.
You can also use a piece of mesh screen over the pump area, then place stones on top. This helps hide the pump while still letting water move through.
Do not block the pump intake completely. The pump needs water flow to work properly.
Step 7: Add Rocks and Pebbles
Arrange stones naturally around the pump. Use larger stones for structure and smaller pebbles to fill gaps.
Avoid packing the stones too tightly. Water needs space to circulate.
Try to create a balanced look. A few natural stones often look better than too many decorations. Keep the focus on the water movement.
Step 8: Fill with Water
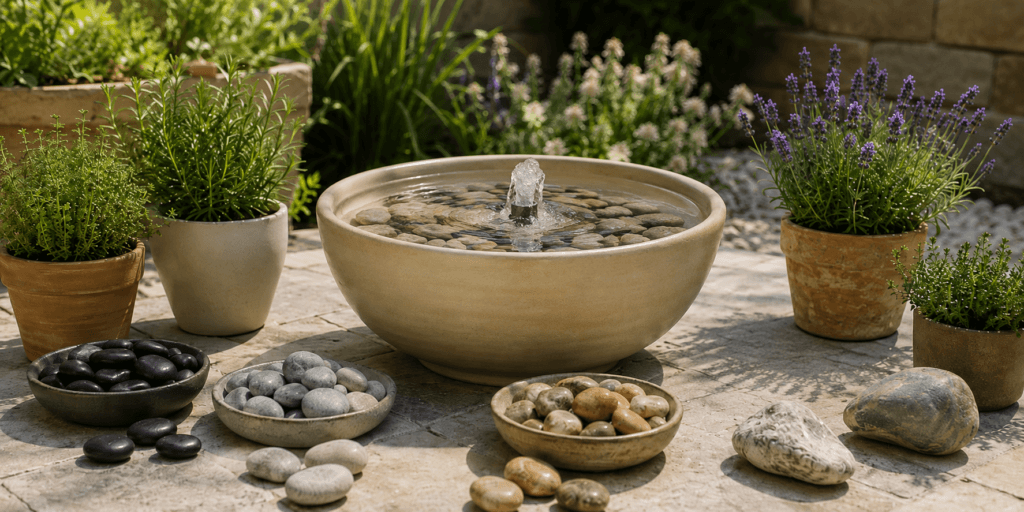
Add clean water until the pump is fully submerged.
The pump should never run dry. If the water level is too low, the pump can make noise, stop working, or get damaged.
Fill slowly and watch how the water settles around the stones.
Step 9: Test the Water Flow
Turn on the pump and watch the water movement.
If the water splashes outside the container, reduce the pump flow or adjust the fountain head. If the water barely moves, increase the flow or check for blockages.
Listen to the sound. A gentle bubbling sound is usually more relaxing than a strong splash.
Let the fountain run for a few minutes and check around the container for leaks, splashing, or cord problems.
Step 10: Style the Fountain Area
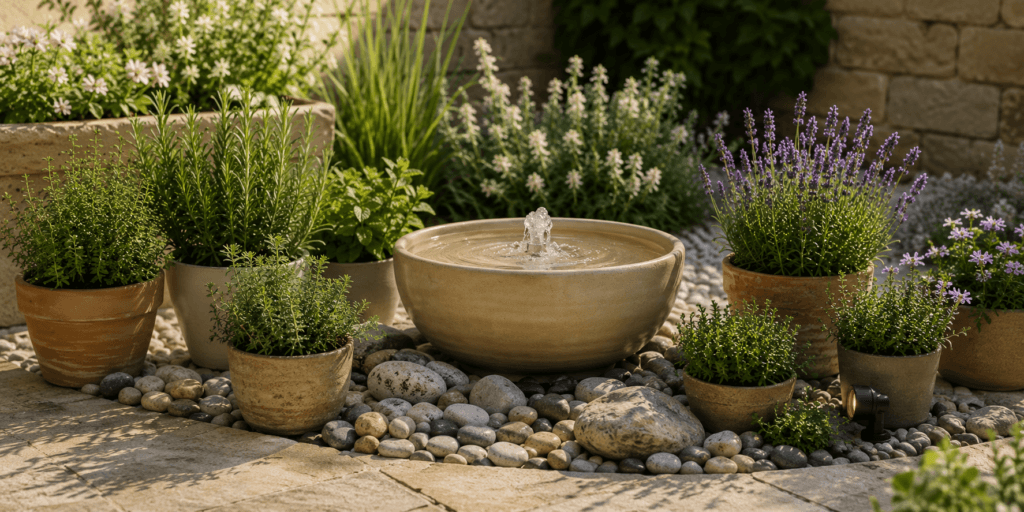
Once the fountain works properly, style the area around it.
You can use:
- Potted herbs
- Lavender
- Thyme
- Rosemary
- Mint
- Small flowers
- Gravel
- Mulch
- Natural stones
- A small bench
- Solar lights
- A simple garden path
You can make the area feel softer by surrounding the fountain with simple herb garden ideas like thyme, mint, lavender, rosemary, or chives in pots.
Keep the styling simple. The fountain should feel calm, not crowded.
Important Safety Tips for a DIY Small Fountain
A small fountain is a simple project, but water and electricity require care.
Use an outdoor-safe pump if the fountain is outside. Read the pump instructions before use. Keep electrical connections dry and protected.
Use a GFCI-protected outdoor outlet where applicable. This helps reduce electrical risk around water.
Always unplug the pump before cleaning, adjusting, or moving it.
Do not let the pump run dry. Check the water level regularly, especially in hot weather.
Keep cords away from walkways, seating areas, and places where people could trip. Hide cords safely without burying or damaging them unless they are made for that purpose.
If you have children or pets, choose a shallow design and place the fountain where it can be supervised. Avoid deep containers in areas where safety may be a concern.
On balconies, check weight limits and make sure water cannot leak into areas below.
How to Maintain a DIY Small Fountain
A small fountain is easy to maintain if you check it regularly. The main tasks are keeping the water level high enough, cleaning debris, and making sure the pump stays clear.
Refill Water Regularly
Water evaporates, especially in warm weather. Refill the fountain whenever the water level gets low.
The pump should always stay submerged.
Remove Leaves and Debris
Leaves, petals, and dirt can fall into the water. Remove them before they break down and clog the pump.
Leaves and plant trimmings from around the fountain can go into your compost, making composting for beginners a useful next skill.
Clean the Pump Intake
The pump intake can collect small debris. If the water flow becomes weak, unplug the pump and check the intake.
Clean it according to the pump instructions.
Control Algae
Algae can grow when water sits in full sun. To reduce algae, place the fountain in partial shade, change the water when needed, and clean the container regularly.
Avoid overloading the fountain with organic material like leaves and soil.
Prepare for Winter
If your area freezes in winter, empty or protect the fountain before freezing temperatures. Water expands when it freezes and can crack containers or damage pumps.
Bring the pump indoors or store it safely if the fountain will not run during winter.
Common DIY Small Fountain Mistakes to Avoid
A small fountain is beginner-friendly, but a few mistakes can cause problems.
Using a Leaking Container
Always test the container before building. A slow leak can ruin the project and damage the area around it.
Choosing a Pump That Is Too Powerful
A strong pump can splash water out of the container. Choose an adjustable pump or one designed for small fountains.
Letting the Pump Run Dry
This can damage the pump. Check the water level often.
Placing the Fountain in Full Sun All Day
Full sun can increase evaporation and algae. Partial shade is usually easier to manage.
Blocking the Pump with Rocks
Rocks can hide the pump, but they should not block water flow. Leave enough space around the pump intake.
Using Too Many Decorations
Too many stones, figurines, or accessories can make the fountain look cluttered. A simple design often looks more natural.
Not Hiding the Cord Safely
The cord should not be a tripping hazard. Keep it protected and placed carefully.
Ignoring Balcony Weight
Containers, stones, and water are heavy. Choose a lightweight setup for balconies and check safety first.
Using Indoor-Only Electrical Parts Outside
Only use outdoor-safe pumps, cords, and connections for outdoor fountains.
Budget-Friendly Styling Tips
A DIY small fountain does not need to be expensive. You can create a beautiful result with simple materials.
Try these budget-friendly ideas:
- Use an old ceramic pot
- Use a thrifted bowl
- Use a galvanized tub
- Add natural stones from a garden center
- Use gravel or mulch around the base
- Surround the fountain with herbs
- Choose a small solar pump
- Keep the design minimal
- Use plants to soften the edges
- Place it near an existing bench or patio chair
A simple fountain can look expensive if it is styled well. Focus on natural textures like stone, wood, terracotta, and greenery.
You do not need to fill the area with decorations. A container fountain, a few stones, and a few plants can be enough.
Simple DIY Small Fountain Plan for Beginners
If you want the easiest version, start with this simple plan.
Beginner Fountain Design
Use:
- One large waterproof bowl or ceramic pot
- One small adjustable submersible pump
- Smooth river stones
- A few larger support stones
- Clean water
- Two or three surrounding plants
Best Placement
Place it:
- On a patio
- In a garden corner
- Near a bench
- Beside a balcony wall
- Near a raised bed path
Best Surrounding Plants
Try:
- Lavender
- Thyme
- Rosemary
- Mint in a pot
- Chives
- Small white flowers
- Ferns for shade
- Ornamental grasses
This setup is simple, attractive, and realistic for beginners. It can be finished in a weekend and adjusted later.
FAQ About DIY Small Fountains
What is the easiest DIY small fountain to make?
The easiest DIY small fountain is a container fountain. You only need a waterproof container, a small submersible pump, rocks, and water. It does not require digging or complicated construction.
Can I make a small fountain without digging?
Yes, you can make a small fountain without digging. A container fountain, bowl fountain, ceramic pot fountain, or patio fountain can sit above ground.
This makes it ideal for patios, balconies, renters, and small gardens.
What kind of pump do I need for a small fountain?
You need a small submersible fountain pump. Choose one that is outdoor-safe if the fountain will be outside. An adjustable pump is best for beginners because you can control the water flow.
Can I use a solar pump for a DIY small fountain?
Yes, you can use a solar pump. Solar pumps are helpful if you do not have an outdoor outlet nearby. However, they usually work best in direct sunlight and may have weaker flow on cloudy days or in shade.
What container works best for a small fountain?
The best container is waterproof, stable, and deep enough to keep the pump submerged. Glazed ceramic bowls, resin planters, sealed concrete containers, metal tubs, and waterproof basins can all work well.
How do I stop algae in a small fountain?
To reduce algae, place the fountain in partial shade, remove leaves and debris, clean the container regularly, and replace dirty water when needed. Full sun can encourage algae growth.
Can I put plants around a small fountain?
Yes, plants can make a small fountain look more natural. Herbs, flowers, ferns, grasses, and small potted plants can soften the edges and make the area feel more finished.
How often should I clean a small fountain?
Check the fountain weekly for leaves, debris, and water level. Clean the pump intake whenever the water flow becomes weak. Deep clean the container when algae or buildup appears.
Can I make a small fountain on a balcony?
Yes, but choose a lightweight setup and check balcony weight limits. Use a stable container, avoid deep water, and make sure water cannot leak or drain into unwanted areas.
How much does a DIY small fountain cost?
The cost depends on the container, pump, stones, and plants you choose. A simple budget fountain can be made with an affordable container, a small pump, and basic stones. Decorative ceramic pots, larger pumps, and extra plants will increase the cost.
Conclusion
A DIY small fountain is a simple way to make your garden, patio, balcony, or backyard corner feel calm and beautiful. You do not need a large pond or professional landscaping to enjoy the sound of moving water at home.
Start with a waterproof container, a small submersible pump, stones, and clean water. Choose a safe location, test the container for leaks, keep the pump submerged, and style the area with plants, gravel, or natural stones.
The best beginner fountain is simple, stable, and easy to maintain. Once it is working, you can add more plants, improve the surrounding garden bed, or create a cozy seating area nearby.
A small fountain may be a simple project, but it can make a big difference in how your outdoor space feels. Start small, keep the design natural, and enjoy the peaceful sound of water in your own garden.
Want more beginner-friendly garden projects, budget backyard ideas, and simple homesteading inspiration? Subscribe to the Dreamsteading newsletter and get practical guides sent straight to your inbox.
Get More Simple Garden DIY Ideas
Love transforming small outdoor spaces with easy, affordable projects? Join the Dreamsteading newsletter for beginner-friendly garden DIYs, practical homesteading tips, and fresh ideas to help you create a more peaceful and productive home.
No spam—just useful inspiration, seasonal tips, and simple projects you can actually complete.