Canning Green Beans: 7 Easy Steps for Delicious Homemade Results
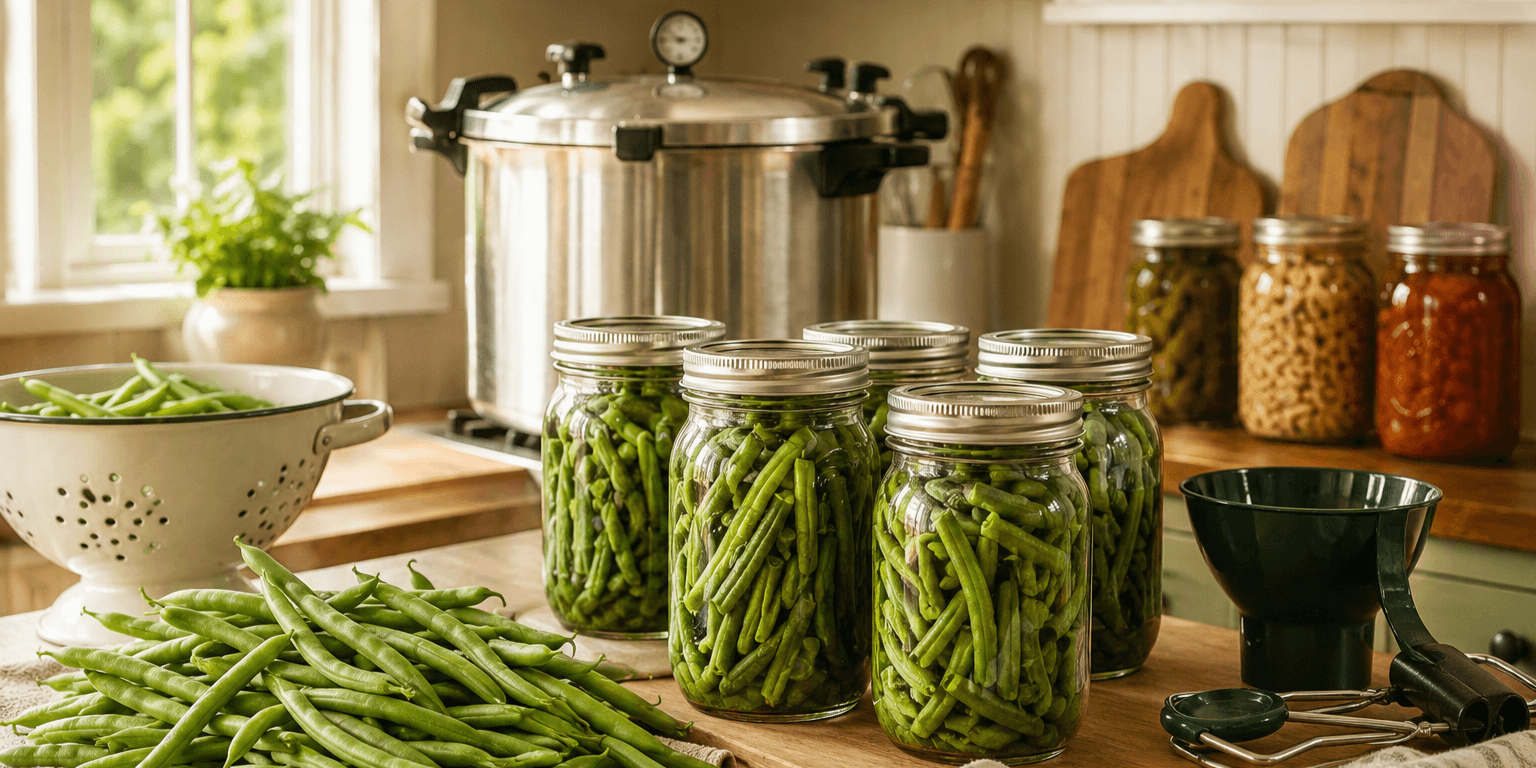
Canning green beans is one of the most practical food preservation skills for gardeners, homesteaders, and anyone who wants to build a useful pantry. When green beans are producing heavily in the garden, it can feel like you go from a small handful to a basket full almost overnight. Pressure canning lets you preserve that harvest so you can enjoy home-canned green beans long after summer ends.
Green beans are useful because they fit into so many everyday meals. You can serve them as a simple side dish, add them to soups, use them in casseroles, mix them into skillet meals, or keep them on the pantry shelf for busy nights when you need a quick vegetable.
Before you begin, there is one important safety rule to understand: plain green beans are a low-acid food, so they must be canned in a pressure canner. They are not safe for regular water bath canning unless you are making a tested pickled green bean recipe with the correct amount of vinegar.
This guide will show you how to safely can green beans using a pressure canner, what equipment you need, how to prepare the beans, the difference between raw pack and hot pack, how long to process jars, and the common beginner mistakes to avoid.
Affiliate Disclosure
This article may contain affiliate links. If you purchase through these links, Dreamsteading may earn a small commission at no extra cost to you. Only use canning supplies and equipment that are appropriate for safe home food preservation.
Important Safety Note Before You Start
Green beans must be processed in a pressure canner using tested instructions. Do not use a boiling water canner for plain green beans. Do not use oven canning, open-kettle canning, dishwasher canning, microwave canning, or an electric pressure cooker for shelf-stable green beans.
A pressure canner is different from a pressure cooker. For safe low-acid canning, use a proper pressure canner that is designed for home canning and follow the correct processing time, headspace, pressure, and altitude adjustments.
This article is for plain green beans canned in water. If you want to water-bath can green beans, use a tested pickled green bean recipe instead.
Why Can Green Beans?
Green beans are one of the best vegetables to preserve because they are easy to grow, easy to harvest, and useful in many meals. If you grow bush beans or pole beans, you may have more fresh beans than your family can eat at once.
Canning helps you preserve the extra harvest without filling your freezer. It also gives you ready-to-use jars for quick meals.
Canning green beans can help you:
- Preserve a summer garden harvest
- Build a practical homestead pantry
- Save freezer space
- Reduce food waste
- Store vegetables without relying only on fresh produce
- Prepare fast side dishes
- Learn pressure canning with a simple vegetable
If you are building your pantry skills, this is one of the most practical food preservation methods for beginners to learn.
Why Green Beans Must Be Pressure Canned
Plain green beans are low-acid. Low-acid foods need higher temperatures than boiling water can provide. A pressure canner reaches those higher temperatures by processing jars under pressure.
This is why green beans are different from jams, pickles, and many fruits. Those high-acid foods can often be processed in a water bath canner when using tested recipes. Plain green beans cannot.
Unlike jams, pickles, and many fruits covered in water bath canning for beginners, plain green beans need a pressure canner.
This does not mean canning green beans is complicated. It simply means the method matters. Once you understand the steps, pressure canning becomes a practical and repeatable kitchen skill.
Best Green Beans for Canning
The best green beans for canning are fresh, tender, crisp pods. They should be mature enough to have good flavor but not so old that they are tough, stringy, rusty, or overgrown.
Good beans for canning include:
- Green snap beans
- Wax beans
- Italian beans
- Bush beans
- Pole beans
Avoid beans that are limp, moldy, diseased, rusty, or overly mature. Canning does not improve poor-quality produce. Start with the best beans you can.
If you grow your own beans, harvest them while they are still tender. Green beans are one of the easy vegetables to grow for beginners, which makes them a great crop for both gardening and preserving.
If you grow beans in your backyard, this guide to raised garden beds for summer planting can help you plan a productive summer harvest.
What You Need for Canning Green Beans
Gather your equipment before you start. Canning is much easier when everything is clean, prepared, and close to your work area.
You will need:
- Fresh green beans
- Pressure canner
- canning jars
- New canning lids
- Screw bands
- Canning Jar Lifter
- Canning funnel
- Bubble remover or clean plastic utensil
- Clean kitchen towels
- Large pot
- Sharp knife or kitchen scissors
- Cutting board
- canning salt, optional
- Clean boiling water
The pressure canner is the most important tool. Plain green beans cannot be made shelf-stable with a water bath canner.
Good canning jars are also important because they are made to handle the heat and pressure of home canning. Always check jars for cracks, chips, or damage before filling them.
A Canning Jar Lifter makes the process much safer because jars are hot, heavy, and slippery when they come out of the pressure canner.
Canning salt is optional. It is used for flavor, not safety. You can safely can plain green beans without salt if you prefer.
How Many Green Beans Do You Need?
As a general guide:
- About 9 pounds of green beans are needed for 9 pint jars
- About 14 pounds of green beans are needed for 7-quart jars
The exact amount can vary depending on the size of your beans, how much you trim away, how tightly you pack the jars, and whether you use pints or quarts.
If you are new to pressure canning, start with a smaller batch. A calm first canning session is better than trying to process too much at once.
Pint jars are a good size for small households or side dishes. Quart jars are useful if you cook for a larger family or often add green beans to soups and casseroles.
Raw Pack vs. Hot Pack Green Beans
There are two common ways to pack green beans for pressure canning: raw pack and hot pack.
Raw Pack
Raw pack means the trimmed beans go into the jars raw. Then boiling water is poured over the beans before processing.
Raw pack is simple and fast. Many beginners like it because it has fewer preparation steps. The beans may shrink more during processing, but it is still a tested method when done correctly.
Hot Pack
Hot pack means the beans are briefly boiled before being packed into jars. This helps the beans settle more evenly and can make the jars easier to fill.
Hot pack takes a little more time, but it can give a better pack in the jar.
Both raw pack and hot pack still require a pressure canner.
How to Prepare Green Beans for Canning
Start by sorting through the beans. Remove any beans that are damaged, rusty, diseased, moldy, or too mature.
Wash the beans well under clean running water. Garden beans can hold dust, soil, or small insects, so take your time with this step.
Trim off the stem ends. You can also trim the pointed tips if you prefer.
Then choose how you want to prepare the beans:
- Leave them whole if they fit nicely in the jars
- Cut them into 1-inch pieces
- Snap them by hand into shorter pieces
Most home canners cut or snap green beans into pieces because they pack easily into jars and are simple to serve later.
Step-by-Step: How to Can Green Beans
Step 1: Prepare the Pressure Canner
Read your pressure canner manual before starting. Add the amount of water recommended by the manufacturer and place the rack inside.
Do not place jars directly on the bottom of the canner. Always use the rack.
Begin heating the canner according to your manual while you prepare the jars and beans.
Step 2: Prepare the Jars and Lids
Check your canning jars for cracks, chips, or rough rims. Damaged jars should not be used for canning.
Wash jars, lids, and bands in hot soapy water. Keep jars hot until you are ready to fill them.
Use new lids for canning. Jars and bands can be reused if they are in good condition, but lids are made for one-time sealing.
Step 3: Wash and Trim the Beans
Wash the green beans thoroughly. Trim the stem ends and remove any tough strings if needed.
Leave the beans whole or cut them into 1-inch pieces. Keep the pieces fairly even so they pack well and are easy to use later.
Step 4: Choose Raw Pack or Hot Pack
For raw pack, fill hot jars tightly with raw beans, leaving 1 inch of headspace.
For hot pack, cover beans with boiling water and boil for 5 minutes. Then fill hot jars loosely with the hot beans, leaving 1 inch of headspace.
Both methods are pressure canned for the same amount of time.
Step 5: Add Canning Salt, If Desired
Salt is optional. It is added for flavor only.
You may add:
- 1/2 teaspoon canning salt per pint
- 1 teaspoon canning salt per quart
Do not use regular table salt if you want clear liquid in the jars, because additives can sometimes cause cloudiness. If you do not want added salt, skip it.
Step 6: Add Boiling Water
Pour boiling water over the beans, leaving 1 inch of headspace.
Headspace is the space between the top of the food or liquid and the rim of the jar. It matters because food expands during processing.
Too little or too much headspace can affect sealing.
Step 7: Remove Air Bubbles
Slide a bubble remover or clean plastic utensil down inside the jar to release trapped air bubbles.
Do not use a metal knife because it can scratch or damage jars.
After removing bubbles, check the headspace again. Add more boiling water if needed to return to 1 inch of headspace.
Step 8: Wipe Rims and Add Lids
Wipe the jar rims with a clean damp towel. Any food residue on the rim can interfere with sealing.
Place lids on the jars and screw the bands on fingertip-tight. Do not overtighten the bands.
Step 9: Load the Pressure Canner
Use a Canning Jar Lifter to place the filled jars upright on the rack inside the pressure canner.
The jars should not be tilted. Keep them upright to protect the headspace and reduce the chance of liquid loss.
Lock the canner lid according to your manufacturer’s instructions.
Step 10: Vent the Canner
Heat the canner until steam flows steadily from the vent. Let the steam vent for 10 minutes.
This step is important because it removes trapped air from inside the canner. Trapped air can affect the temperature inside the canner.
After venting, add the weight or close the vent according to your canner instructions.
Step 11: Process the Jars
Process green beans for:
| Jar Size | Processing Time |
|---|---|
| Pints | 20 minutes |
| Quarts | 25 minutes |
Start timing only when the canner reaches the correct pressure.
Pressure depends on your altitude and the type of pressure canner you use. Dial-gauge and weighted-gauge canners use different pressure guidelines, so check your manual and adjust for elevation.
Pressure Canning Guide by Altitude
Use the correct pressure for your canner type and altitude.
| Altitude | Dial-Gauge Canner | Weighted-Gauge Canner |
|---|---|---|
| 0–1,000 ft | 11 lb | 10 lb |
| 1,001–2,000 ft | 11 lb | 15 lb |
| 2,001–4,000 ft | 12 lb | 15 lb |
| 4,001–6,000 ft | 13 lb | 15 lb |
| 6,001–8,000 ft | 14 lb | 15 lb |
If you are not sure of your altitude, check before canning. Altitude affects pressure canning safety.
Step 12: Let the Canner Cool Naturally
When the processing time is finished, turn off the heat and let the pressure canner return to zero pressure naturally.
Do not force-cool the canner. Do not run water over it. Do not remove the weight early. Do not open the lid before pressure has fully returned to zero.
After the pressure is down, wait a few minutes, then open the lid away from your face so steam moves away from you.
Step 13: Remove and Cool the Jars
Use a Canning Jar Lifter to remove the jars carefully.
Place them on a towel with space between each jar. Let them cool undisturbed for 12 to 24 hours.
Do not tighten the bands. Do not press the lids while they are cooling. Do not move the jars around unnecessarily.
How to Check the Seals
After 12 to 24 hours, check the seals.
A sealed lid should not flex up and down when pressed in the center. Remove the screw bands and gently check that each lid is firmly attached.
If a jar did not seal, refrigerate it and use it within a few days, or reprocess it using a new lid and safe instructions.
Do not store unsealed jars on the pantry shelf.
How to Store Home Canned Green Beans
Once the jars are sealed, remove the ring bands. Wipe the jars clean, label them with the contents and date, and store them in a cool, dark, dry place.
Good storage places include:
- Pantry shelves
- Cool cupboards
- Basement storage
- Food storage room
Avoid storing jars in direct sunlight, near heat, or in damp areas.
For best quality, use home canned green beans within about one year.
Before opening a jar, check for signs of spoilage. Do not taste food from a jar that looks suspicious, has a broken seal, spurts liquid, smells bad, or shows mold.
How to Use Home Canned Green Beans
Home canned green beans are already cooked during processing, so they are best used in meals where a softer texture works well.
You can use them in:
- Simple side dishes
- Soups
- Stews
- Casseroles
- Pot pies
- Rice bowls
- Skillet meals
- Vegetable mixes
- Homestead pantry meals
For a quick side dish, drain the beans and warm them with butter, garlic, onion, black pepper, herbs, or a little broth.
Canned green beans are especially helpful when you need a vegetable quickly without washing, trimming, and cooking fresh beans from scratch.
Common Mistakes to Avoid
Using a Water Bath Canner
Plain green beans are low-acid and must be pressure canned. A water bath canner is not safe for plain green beans.
Using an Electric Pressure Cooker
An electric pressure cooker or multi-cooker is not the same as a tested pressure canner for shelf-stable low-acid foods.
Skipping Altitude Adjustments
Pressure changes with elevation. Always adjust pressure based on your altitude.
Not Venting the Canner
Venting the canner for 10 minutes helps remove trapped air. Do not skip this step.
Forgetting Headspace
Green beans need 1 inch of headspace. Incorrect headspace can affect sealing and processing.
Reusing Old Lids
Use new lids for every canning batch. Old lids may not seal reliably.
Opening the Canner Too Early
Let pressure return to zero naturally. Opening the canner too early can be dangerous and may cause liquid loss from jars.
Canning Poor-Quality Beans
Start with fresh, tender beans. Avoid tough, rusty, moldy, or damaged beans.
Packing Jars Incorrectly
Raw pack beans can be packed tightly, but do not crush them. Hot pack beans should be packed more loosely.
Beginner Tips for Better Results
Keep your first batch small. A small batch helps you learn the process without feeling rushed.
Prepare your work area before you start. Have clean jars, lids, bands, towels, tools, and beans ready.
Use a proper jar lifter. A Canning Jar Lifter is safer than trying to lift hot jars with tongs or towels.
Label every jar. Write the food and date on the lid or label so you know what to use first.
Do not change tested instructions. Do not add thickeners, dairy, bacon, meat, or extra vegetables to plain canned green beans unless you are using a tested recipe for that exact mixture.
FAQ About Canning Green Beans
Can green beans be canned in a water bath canner?
Plain green beans should not be canned in a water bath canner. They are low-acid and must be processed in a pressure canner. The exception is a tested pickled green bean recipe with enough vinegar.
Do green beans need to be pressure canned?
Yes. Plain green beans need to be pressure canned because they are a low-acid vegetable.
How long do you pressure can green beans?
Process pint jars for 20 minutes and quart jars for 25 minutes. The pressure depends on your canner type and altitude.
Should I raw pack or hot pack green beans?
Both methods can be used. Raw pack is faster and simpler. Hot pack takes a little longer but can help the beans settle better in the jar.
Do I need to add salt when canning green beans?
No. Salt is optional and used for flavor only. You can add canning salt if desired, or leave it out completely.
Can I can green beans whole?
Yes. You can leave green beans whole if they fit in the jars, or you can cut or snap them into 1-inch pieces.
Why are my canned green beans floating?
Floating can happen when beans shrink during processing, especially with raw pack. It does not always mean the jar is unsafe, but always check the seal and inspect the food before using it.
Why did liquid come out of my jars?
Liquid loss can happen if pressure changes too quickly, jars are packed incorrectly, headspace is wrong, or the canner is opened too soon. If the jar sealed properly, store it and use it first.
How long do home canned green beans last?
For best quality, use home canned green beans within about one year. Always inspect jars before eating.
Can I use an Instant Pot for canning green beans?
No. Use a proper pressure canner for shelf-stable green beans, not an Instant Pot or electric multi-cooker.
Conclusion
Canning green beans is a practical way to preserve a summer garden harvest and build a useful homestead pantry. Once you understand the safety rules, the process becomes much less intimidating.
The most important thing to remember is that plain green beans must be pressure canned. They are not safe for water bath canning unless you are making a tested pickled recipe.
Start with fresh, tender beans. Wash and trim them, choose raw pack or hot pack, leave 1 inch of headspace, process them for the correct time, and adjust pressure for your altitude.
With a few jars of home canned green beans on the shelf, you can enjoy your garden harvest long after summer ends.
Want more beginner-friendly food preservation guides, pantry skills, and homesteading tips? Subscribe to the Dreamsteading newsletter and get practical guides sent straight to your inbox.