Easy Food Preservation Pantry Setup: Avoid Costly Storage Mistakes
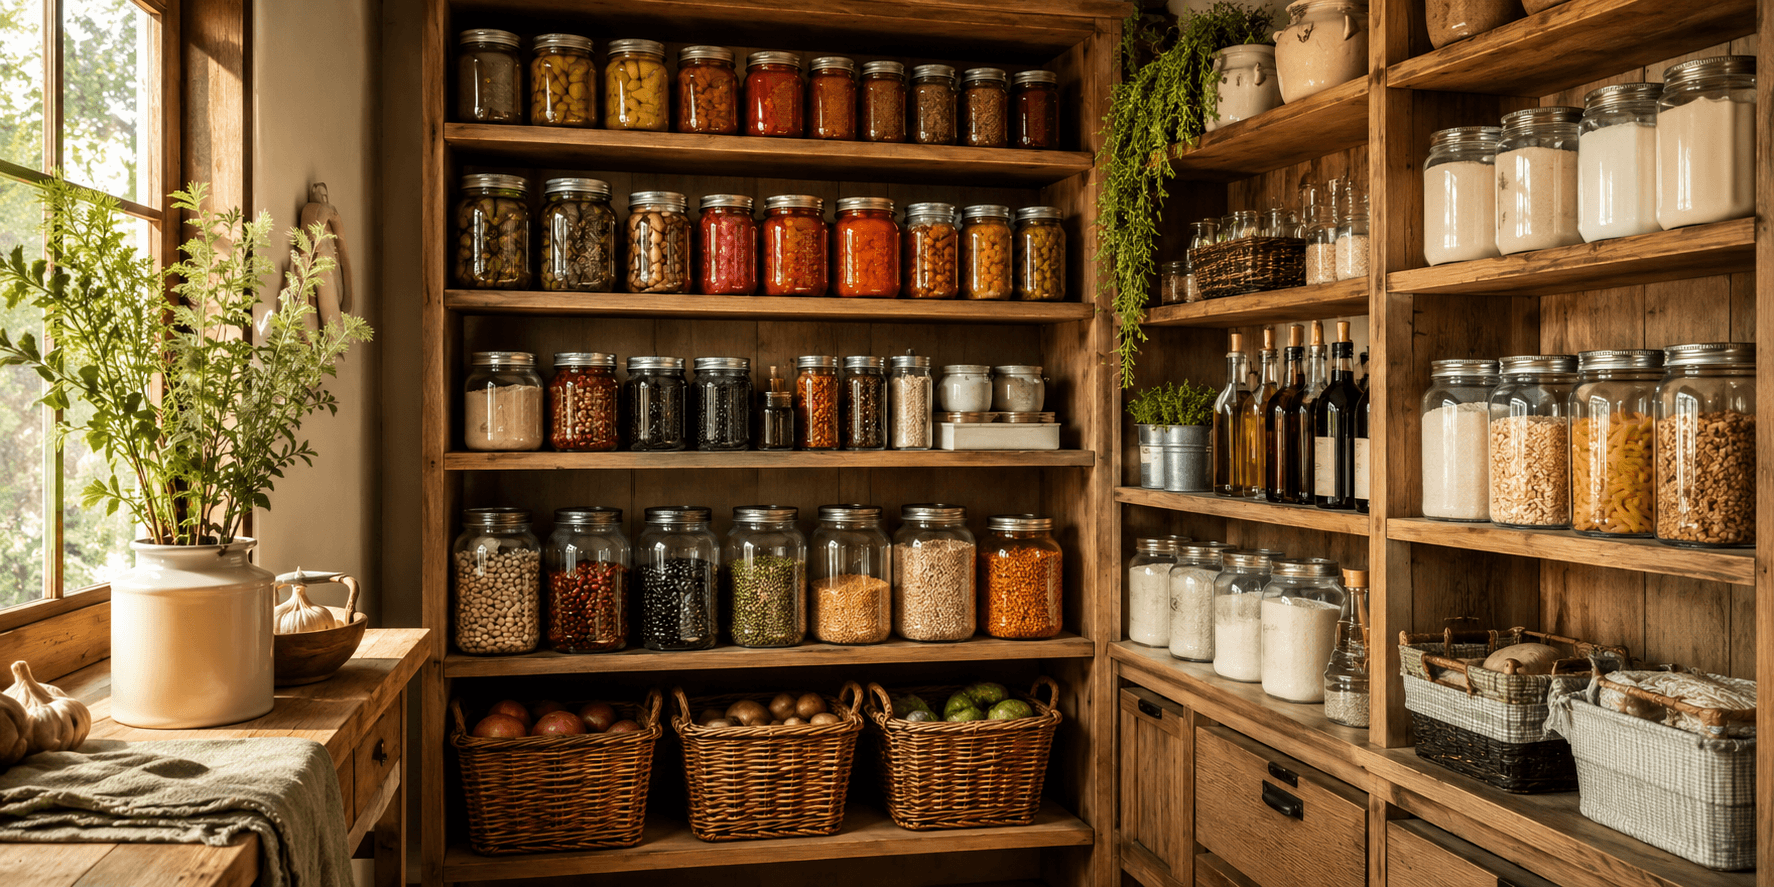
Food preservation pantry setup is just as important as the preserving itself. You can spend hours canning green beans, drying herbs, storing flour, organizing rice, and saving jars of homemade food, but if your pantry is hot, damp, messy, or poorly organized, your preserved food will be harder to use and may lose quality faster.
A good pantry does not need to be huge or perfect. It simply needs to be cool, dark, dry, clean, and organized enough that you can find what you have. The goal is to store home-canned jars, dried foods, pantry staples, preserving ingredients, and canning supplies in a way that makes sense for everyday life.
The most useful pantry is not the prettiest one. It is the one that helps you cook, rotate food, avoid waste, and feel confident about your food storage.
In this guide, you will learn how to set up a food preservation pantry, what foods to store together, what to keep separate, how to organize shelves, and which common pantry storage mistakes to avoid.
What Is a Food Preservation Pantry?
A food preservation pantry is a dedicated storage space for preserved foods, dry goods, pantry staples, and preservation supplies.
It can be a full walk-in pantry, a kitchen cabinet, a basement shelf, a closet, a freestanding shelving unit, or a few organized bins. The size matters less than the system.
A food preservation pantry may include:
- Home-canned vegetables
- Home-canned beans
- Jams and jellies
- Pickles and relishes
- Dehydrated fruits
- Dehydrated vegetables
- Dried herbs
- Rice
- Pasta
- Flour
- Sugar
- Salt
- Oats
- Dry beans
- Lentils
- Vinegar
- Canning jars
- New lids
- Labels
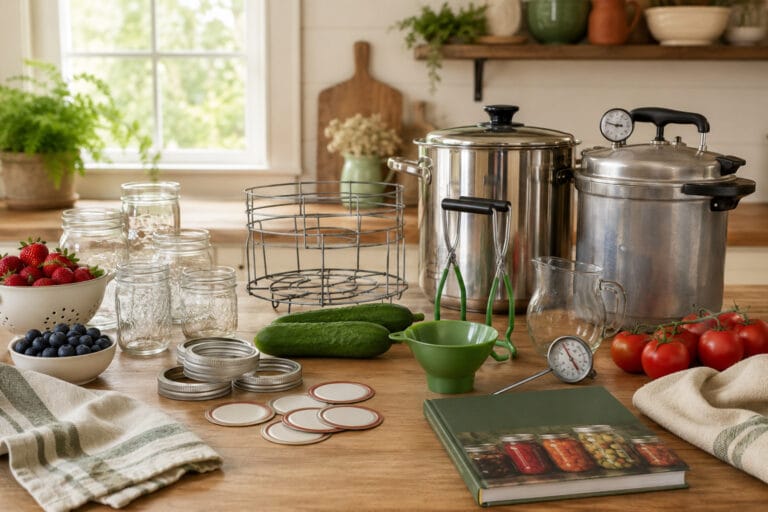
- Canning tools
- Baking supplies
- Pantry meal staples
If you are still learning the basics, this guide to food preservation methods for beginners can help you decide what belongs in your pantry first.
Why Pantry Setup Matters
Preserving food is only half of the process. The other half is storing it correctly.
A well-organized pantry helps you:
- Find food quickly
- Use older items first
- Avoid buying duplicates
- Reduce waste
- Keep home-canned jars safer
- Protect dry goods from moisture
- Keep strong smells away from delicate foods
- Plan meals more easily
- Track what you have preserved
- Build a more practical homestead pantry
Without a system, preserved food can get lost at the back of a shelf. Jars may go unlabeled. Dry goods may sit in open bags. You may forget what you canned, when you canned it, or what needs to be used first.
A food preservation pantry should make your life simpler, not more complicated.
The Best Pantry Conditions for Preserved Food
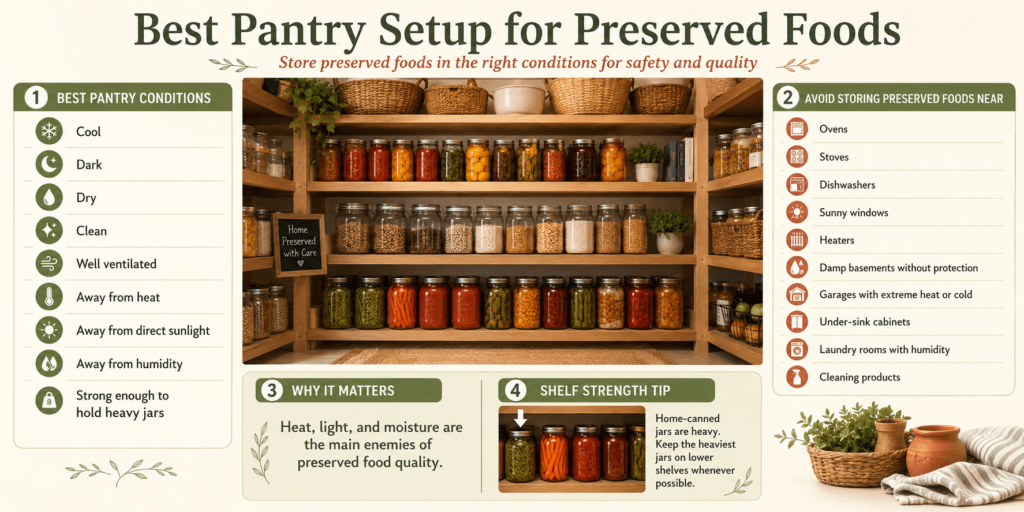
The best pantry for preserved foods is:
- Cool
- Dark
- Dry
- Clean
- Well ventilated
- Away from heat
- Away from direct sunlight
- Away from humidity
- Strong enough to hold heavy jars
Heat, light, and moisture are the main enemies of preserved food quality.
Avoid storing preserved foods near:
- Ovens
- Stoves
- Dishwashers
- Sunny windows
- Heaters
- Damp basements without protection
- Garages with extreme heat or cold
- Under-sink cabinets
- Laundry rooms with humidity
- Cleaning products
Home-canned jars are heavy, so shelving strength matters. A full shelf of canned jars weighs much more than a shelf of boxed pasta or empty jars. Keep the heaviest jars on lower shelves whenever possible.
Pantry Zones: What to Store Together
The easiest way to organize a food preservation pantry is to create zones. Each zone has a clear purpose.
You do not need fancy containers to start. A simple shelf label, basket, or grouped area can make a big difference.
Zone 1: Home-Canned Jars
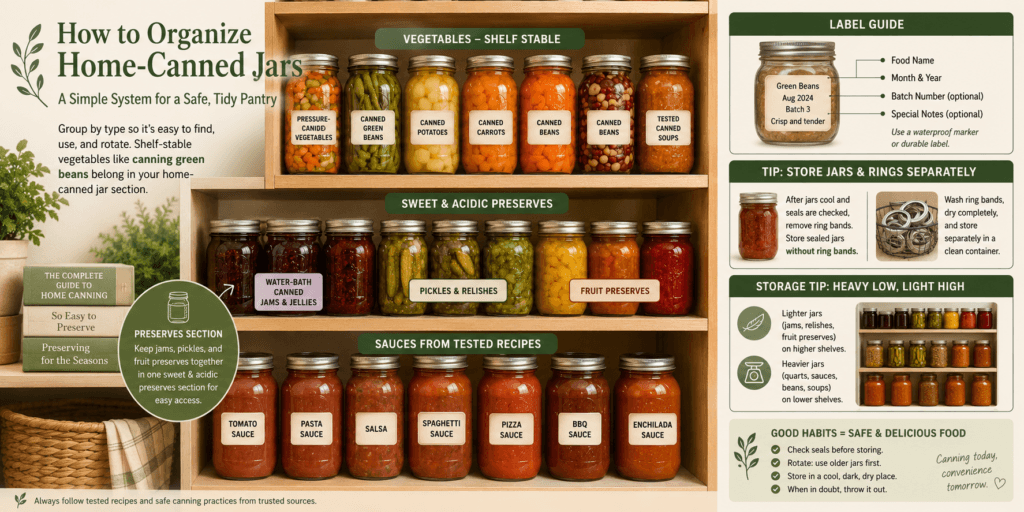
This zone is for sealed jars of home-canned food.
Store together:
- Pressure-canned vegetables
- Canned green beans
- Canned potatoes
- Canned carrots
- Canned beans
- Tested canned soups
- Water-bath canned jams
- Jellies
- Pickles
- Relishes
- Fruit preserves
- Sauces from tested recipes
Shelf-stable vegetables like canning green beans belong in the home-canned jar section of your pantry.
The best way to organize home-canned jars is by type. Keep vegetables together, fruits together, jams together, and pickled foods together. This makes it easier to see what you have.
Label every jar with the contents and date. Even if you think you will remember, many jars look similar after a few months.
A simple jar label can include:
- Food name
- Month and year
- Batch number, optional
- Special notes, optional
Store sealed jars without ring bands. Once the jars are sealed and cooled, the bands can be removed, washed, dried, and stored separately. This helps you notice seal problems and prevents rings from rusting onto jars.
Keep heavy jars on lower shelves. If you have several shelves of canned food, put quarts and heavier jars lower and lighter items higher.
Jams, pickles, and many fruit preserves from water bath canning for beginners can be grouped together in a sweet and acidic preserves section.
Zone 2: Dehydrated Foods
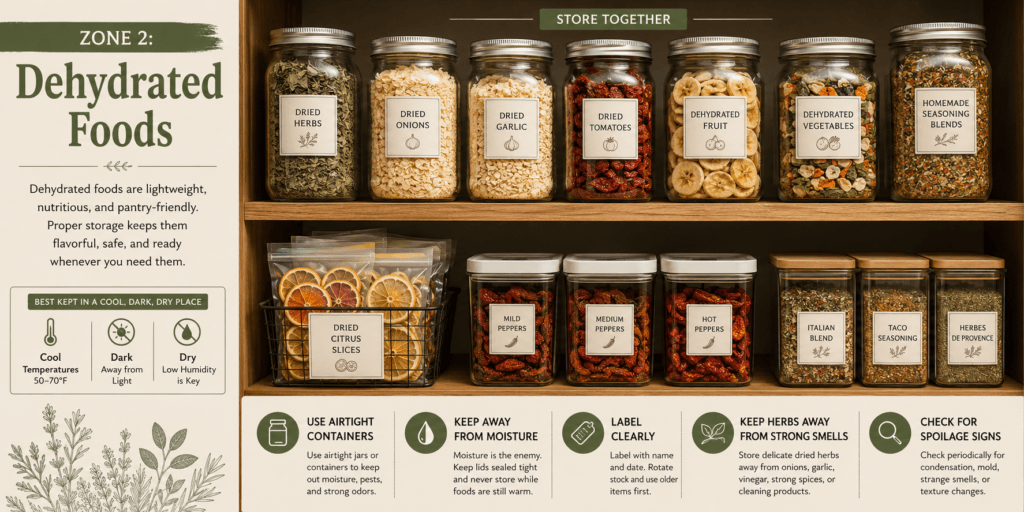
This zone is for foods that have been dried or dehydrated.
Store together:
- Dried herbs
- Dried onions
- Dried garlic
- Dried tomatoes
- Dehydrated fruit
- Dehydrated vegetables
- Homemade seasoning blends
- Dried citrus slices
- Dried peppers
Dehydrated foods need protection from moisture. If moisture gets inside the container, dried food can soften, clump, mold, or spoil.
Use airtight jars or containers whenever possible. Label everything clearly because dried foods can look similar once stored.
Keep delicate dried herbs away from strong smells. Herbs can absorb odors and lose their fresh flavor faster if stored near onions, garlic, vinegar, strong spices, or cleaning products.
If you are storing herbs from your garden, learning how to dry herbs will help you keep them flavorful and pantry-ready.
A good dehydrated food zone should be easy to check. Once in a while, look for condensation, mold, strange smells, or changes in texture.
Zone 3: Dry Goods
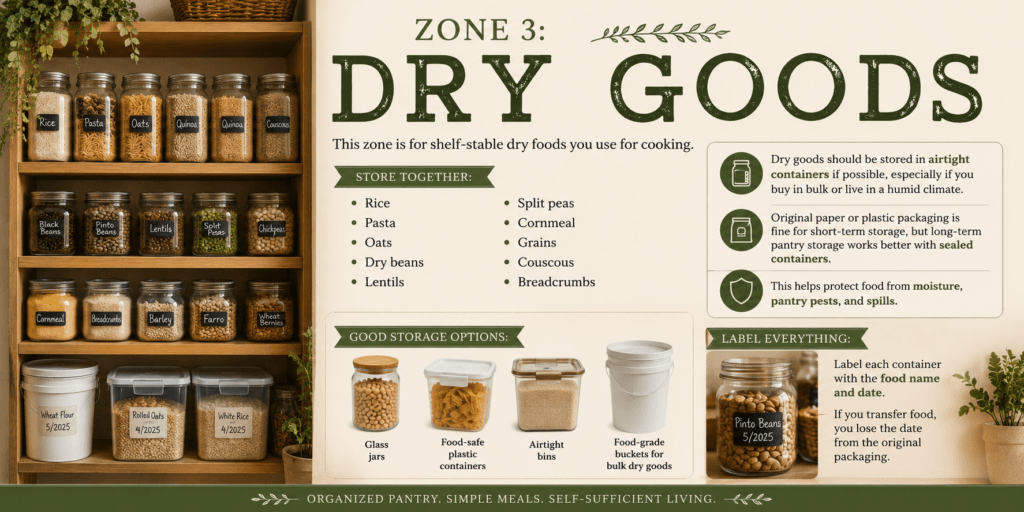
This zone is for shelf-stable dry foods you use for cooking.
Store together:
- Rice
- Pasta
- Oats
- Dry beans
- Lentils
- Split peas
- Cornmeal
- Grains
- Couscous
- Breadcrumbs
Dry goods should be stored in airtight containers if possible, especially if you buy in bulk or live in a humid climate.
Original paper or plastic packaging is fine for short-term storage, but long-term pantry storage works better with sealed containers. This helps protect food from moisture, pantry pests, and spills.
Good storage options include:
- Glass jars
- Food-safe plastic containers
- Airtight bins
- Food-grade buckets for bulk dry goods
Label each container with the food name and date. If you transfer food out of its original package, consider saving the cooking instructions or writing them on the label.
Zone 4: Baking Staples
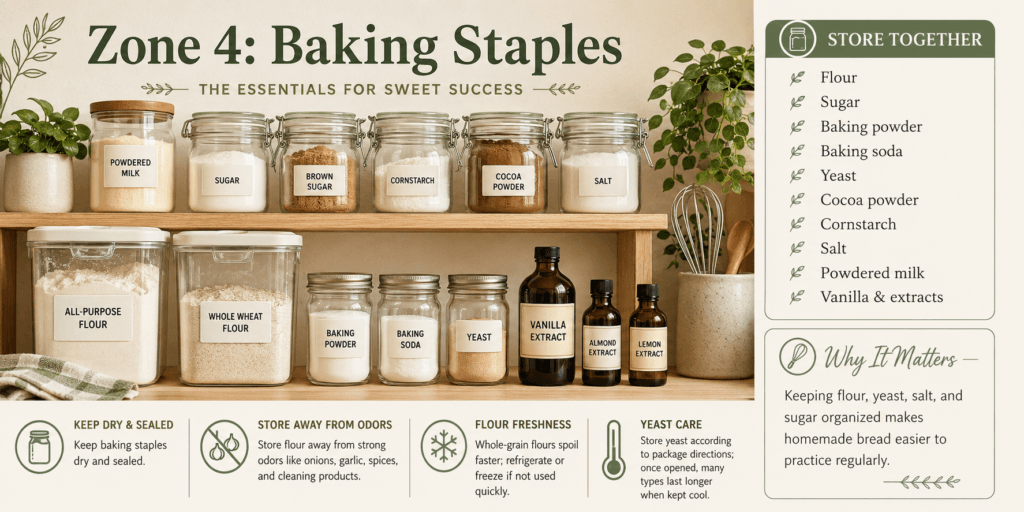
This zone is for ingredients used in baking and from-scratch cooking.
Store together:
- Flour
- Sugar
- Baking powder
- Baking soda
- Yeast
- Cocoa powder
- Cornstarch
- Salt
- Powdered milk, if used
- Vanilla and extracts
Keeping flour, yeast, salt, and sugar organized makes homemade bread for beginners much easier to practice regularly.
Baking staples should be kept dry and sealed. Flour can absorb moisture and odors, so avoid storing it near strong-smelling foods like onions, garlic, spices, or cleaning products.
Whole-grain flours can go rancid faster than white flour because they contain more natural oils. If you do not use them quickly, consider storing them in the refrigerator or freezer.
Yeast should be stored according to the package directions. Once opened, many types last longer when kept cold.
Zone 5: Preserving Ingredients
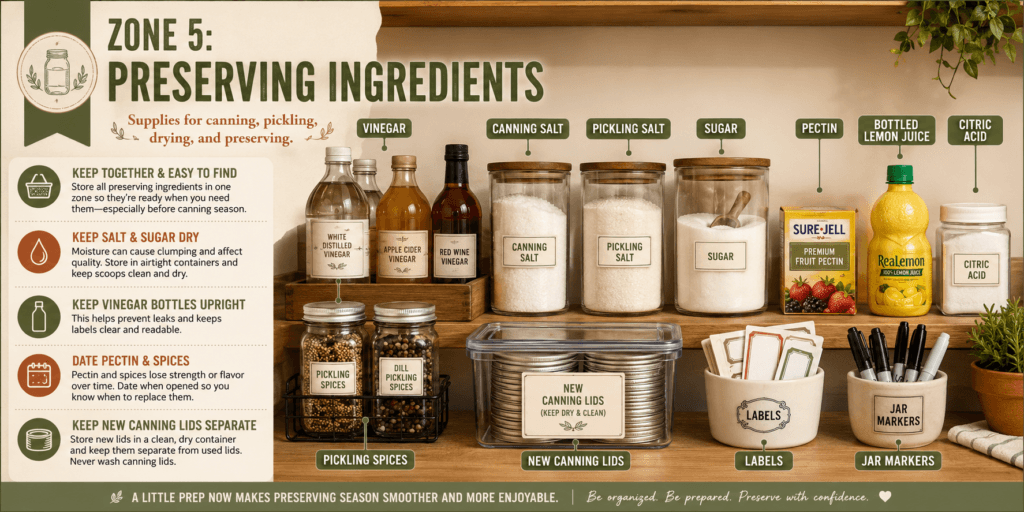
This zone is for ingredients used specifically for canning, pickling, drying, and preserving.
Store together:
- Vinegar
- Canning salt
- Pickling salt
- Sugar
- Pectin
- Bottled lemon juice
- Citric acid
- Pickling spices
- New canning lids
- Labels
- Jar markers
These items should be easy to find before canning season starts. There is nothing more frustrating than preparing produce and then realizing you are missing lids, vinegar, salt, or labels.
Keep salt and sugar dry. Keep vinegar bottles upright. Store pectin and spices with dates because they can lose strength or flavor over time.
Keep new canning lids clean, dry, and separate from used lids. New lids are for processing jars. Used lids can be saved for dry storage, leftovers, crafts, or non-canning use, but they should not be reused for canning.
Zone 6: Everyday Meal Staples
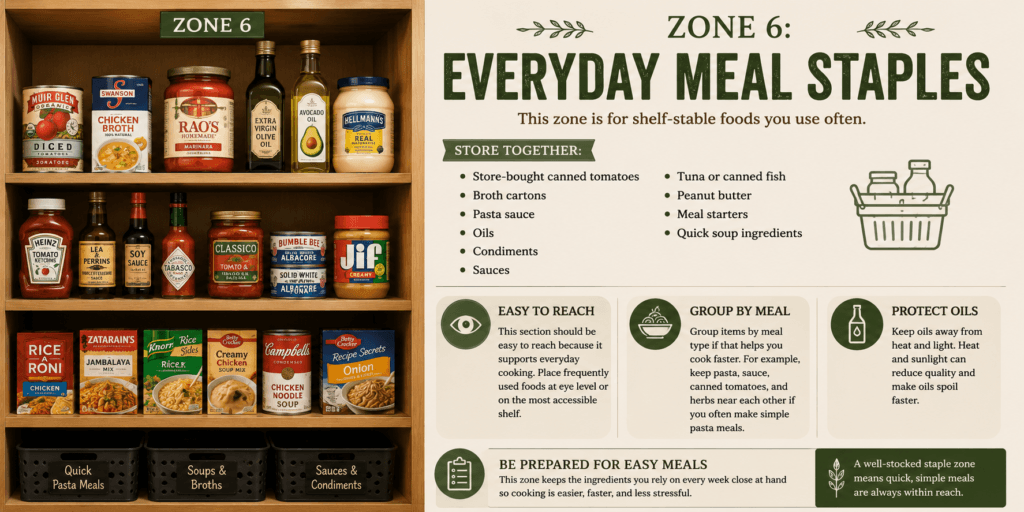
This zone is for shelf-stable foods you use often.
Store together:
- Store-bought canned tomatoes
- Broth cartons
- Pasta sauce
- Oils
- Condiments
- Sauces
- Tuna or canned fish
- Peanut butter
- Meal starters
- Quick soup ingredients
This section should be easy to reach because it supports everyday cooking. Place frequently used foods at eye level or on the most accessible shelf.
Group items by meal type if that helps you cook faster. For example, keep pasta, sauce, canned tomatoes, and herbs near each other if you often make simple pasta meals.
Keep oils away from heat and light. Heat and sunlight can reduce quality and make oils spoil faster.
Zone 7: Canning Tools and Supplies
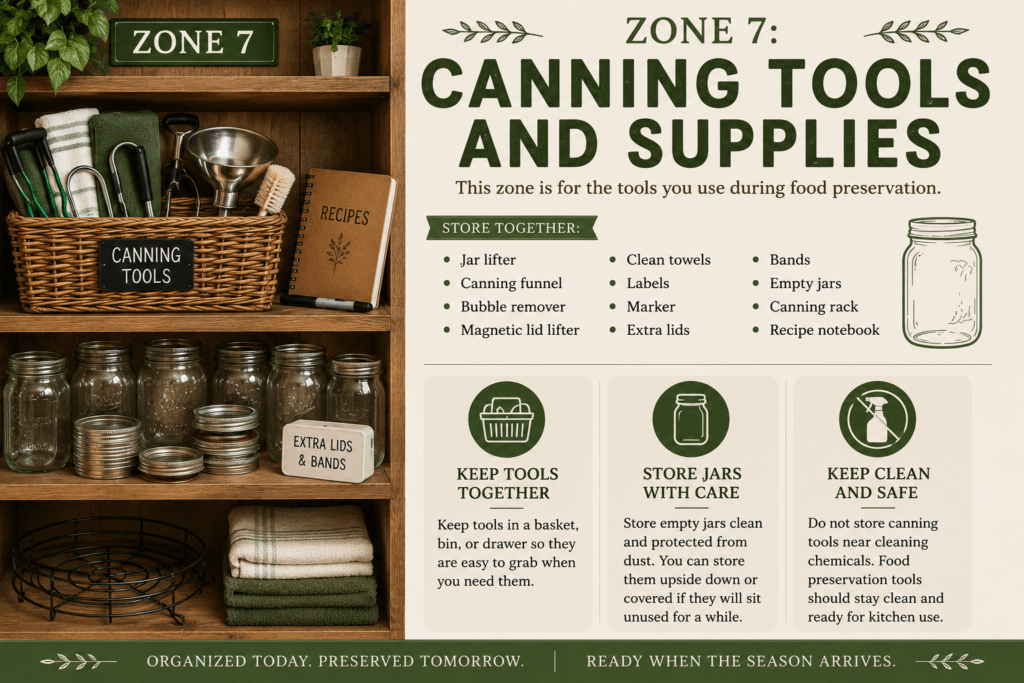
This zone is for the tools you use during food preservation.
Store together:
- Jar lifter
- Canning funnel
- Bubble remover
- Magnetic lid lifter
- Clean towels
- Labels
- Marker
- Extra lids
- Bands
- Empty jars
- Canning rack
- Recipe notebook
Keep tools in a basket, bin, or drawer so they are easy to grab when you need them.
Store empty jars clean and protected from dust. You can store them upside down or covered if they will sit unused for a while.
Do not store canning tools near cleaning chemicals. Food preservation tools should stay clean and ready for kitchen use.
What Not to Store Together
Knowing what to separate is just as important as knowing what to group together.
Some foods affect each other through moisture, odors, gases, or storage conditions. Other items simply do not belong near food at all.
1. Do Not Store Potatoes and Onions Together
Potatoes and onions are both common pantry foods, but they should not be stored together for long periods.
Potatoes prefer a cool, dark, ventilated space. Onions also need ventilation, but they can encourage potatoes to sprout faster when stored close together.
Store potatoes in a breathable basket, paper bag, or crate. Store onions in a separate ventilated container away from potatoes.
Do not store potatoes in airtight plastic bags. They need airflow.
2. Do Not Store Strong-Smelling Foods Near Delicate Dry Goods
Some foods absorb smells easily. Flour, oats, rice, dried herbs, and dehydrated fruits can pick up odors from strong-smelling foods.
Keep these away from delicate dry goods:
- Onions
- Garlic
- Strong spices
- Coffee
- Vinegar
- Cleaning products
- Scented candles
- Scented pantry liners
Keep delicate foods in sealed containers and separate areas when possible.
3. Do Not Store Cleaning Products Near Food
Cleaning sprays, bleach, detergents, pest control products, and chemicals should never be stored near food.
Even if containers are closed, spills, leaks, and fumes can create problems. Keep cleaning products in a separate cabinet, laundry area, utility closet, or under-sink space away from pantry food.
Your food preservation pantry should be for food, jars, tools, and food-safe supplies only.
4. Do Not Store Home-Canned Jars Near Heat
Heat can reduce the quality of home-canned food. It can affect color, flavor, texture, and overall storage life.
Avoid storing jars:
- Beside the stove
- Above the oven
- Near a dishwasher
- Near a heater
- In direct sunlight
- In a hot garage
- In a warm attic
A cool pantry shelf is much better than a pretty shelf near a sunny kitchen window.
5. Do Not Store Dry Goods in Damp Areas
Dry goods and moisture do not mix.
Keep these foods away from damp areas:
- Flour
- Rice
- Oats
- Pasta
- Dry beans
- Lentils
- Sugar
- Salt
- Dehydrated foods
- Powdered foods
Moisture can cause clumping, mold, spoilage, and pantry pests. If your pantry is humid, use airtight containers and check food regularly.
6. Do Not Put Heavy Jars on Weak Shelves
Home-canned jars are heavy. A shelf that looks fine with cereal boxes may not be strong enough for several rows of quart jars.
Use sturdy shelving. Keep heavy jars low. Avoid stacking too many filled jars in unsafe ways.
If you use freestanding shelves, make sure they are stable and not overloaded.
7. Do Not Mix New Canning Lids with Used Lids
New lids and used lids should have separate storage areas.
New lids are for canning. Used lids should not be used for processing new jars of food.
To avoid confusion, keep a labeled container for new lids and a separate container for used lids.
Best Pantry Layout for Beginners
A simple pantry layout can make your food storage easier to manage.
You can adjust this based on the size and shape of your pantry, but the basic idea is to keep heavy foods low, everyday foods easy to reach, and light supplies higher.
Top Shelves
Use top shelves for lighter items.
Good choices include:
- Empty jars
- Extra labels
- New lids
- Seasonal tools
- Light baskets
- Backup supplies
- Paper goods used for canning
Avoid storing heavy filled jars on high shelves. They are harder to lift safely and could break if dropped.
Eye-Level Shelves
Use eye-level shelves for foods you use most often.
Good choices include:
- Everyday pantry staples
- Frequently used home-canned foods
- Pasta
- Rice
- Beans
- Sauces
- Meal starters
- Snacks or quick ingredients
Eye-level shelves are also a good place for foods that need to be used soon. This helps prevent waste.
Lower Shelves
Use lower shelves for heavy items.
Good choices include:
- Filled quart jars
- Bulk dry goods
- Flour containers
- Sugar containers
- Large vinegar bottles
- Food-grade buckets
- Root crop baskets
Lower shelves are safer for heavy storage and easier to organize by weight.
Baskets and Bins
Baskets and bins are helpful for small items that easily get lost.
Use baskets for:
- Jar rings
- Labels
- Canning tools
- Seasoning packets
- Small spice jars
- Dehydrated foods
- Tea bags
- Extra lids
- Pantry inventory supplies
Label baskets so you do not have to pull everything out to find one tool.
A Simple Food Preservation Pantry System
Use this system to keep your pantry manageable:
- Group similar foods together.
- Label every jar and container.
- Date home-canned and preserved foods.
- Store older food in front.
- Store newer food behind.
- Keep heavy jars low.
- Keep dry goods airtight.
- Keep strong smells separate.
- Store food away from chemicals.
- Check your pantry regularly.
- Use a simple inventory list.
- Cook from the pantry before buying more.
This system is simple, but it works.
The most important habit is rotation. Use older food first and place newer food behind it. This is often called “first in, first out.”
Pantry Inventory: Why You Need One
A pantry inventory helps you know what you actually have.
It can be as simple as a notebook, a printable sheet, a spreadsheet, or a whiteboard inside the pantry door.
Track:
- Food name
- Quantity
- Date preserved or purchased
- Best-use date
- Shelf location
- Notes
A pantry inventory helps you avoid buying more of what you already have. It also helps you see what your family actually eats.
For example, if you canned 20 jars of green beans but still have 15 left after a year, you may not need to can as many next season. If you run out of tomatoes quickly, you may want to grow or preserve more.
A pantry should reflect your real kitchen habits, not an ideal version of what you think you should eat.
Common Pantry Mistakes to Avoid
Forgetting to Label Jars
Unlabeled jars become confusing quickly. Always label preserved food with the name and date.
Keeping Ring Bands on Sealed Jars
After jars are sealed and cooled, remove ring bands for storage. This makes it easier to notice seal problems and prevents rust.
Storing Food Near Heat
Heat shortens quality. Keep preserved food away from ovens, stoves, heaters, and sunny windows.
Storing Dry Goods in Original Bags Too Long
Paper and thin plastic bags are not ideal for long-term storage. Move dry goods into airtight containers.
Buying Too Much Before Learning What You Eat
A full pantry is only useful if it contains food your family actually uses.
Ignoring Moisture
Moisture can damage dry goods, dehydrated foods, lids, bands, and labels.
Mixing Food and Cleaning Supplies
Food and chemicals should always be separated.
Putting Heavy Jars Too High
Heavy jars are safer on lower shelves.
Not Rotating Older Food
If you do not rotate, older food gets pushed to the back and forgotten.
What to Keep in a Beginner Food Preservation Pantry
Start simple. You do not need to fill every shelf immediately.
A beginner pantry can include:
- A few jars of home-canned vegetables
- Jams or fruit preserves
- Pickles or relishes
- Dried herbs
- Rice
- Pasta
- Oats
- Dry beans or lentils
- Flour
- Sugar
- Salt
- Vinegar
- Canning jars
- New lids
- Labels
- A few basic canning tools
As you learn what your family uses, expand slowly.
A small pantry that you understand is better than a large pantry full of forgotten food.
How to Make a Small Pantry Work
You can set up a food preservation pantry even if you do not have a walk-in pantry.
Use:
- One strong shelf
- A kitchen cabinet
- A closet
- A rolling cart
- Stackable bins
- Under-stair storage
- A utility shelf
- A cool bedroom closet
The same rules apply: cool, dark, dry, clean, and organized.
In a small pantry, use vertical space carefully. Store heavy jars low and lighter supplies above. Use labels so you do not have to search through every bin.
If space is limited, focus on the foods you use most often.
FAQ About Food Preservation Pantry Setup
What is a food preservation pantry?
A food preservation pantry is a storage area for home-canned jars, dehydrated foods, dry goods, preserving ingredients, and pantry supplies. It helps keep preserved food organized and easy to use.
Where should I store home-canned jars?
Store home-canned jars in a cool, dark, dry place away from heat, sunlight, moisture, and temperature extremes. Use strong shelves and keep heavy jars low.
Should I store home-canned jars with the rings on?
After jars are sealed, cooled, checked, and cleaned, it is best to remove the ring bands for storage. This helps you spot seal problems and prevents rust.
Can I store potatoes and onions together?
It is better not to store potatoes and onions together for long periods. Keep them in separate cool, dark, ventilated areas.
What foods should not be stored near flour?
Keep flour away from strong-smelling foods like onions, garlic, strong spices, coffee, vinegar, and cleaning products. Flour can absorb odors.
Can I store canning supplies in the pantry?
Yes, clean canning tools, jars, lids, labels, and bands can be stored in the pantry. Keep them dry, organized, and away from cleaning products.
What should go on lower pantry shelves?
Lower shelves are best for heavy items like filled jars, bulk dry goods, flour containers, sugar containers, vinegar bottles, and food-grade buckets.
How often should I check my pantry?
Check your pantry at least once a month. Look for broken seals, leaks, pests, moisture, expired foods, damaged containers, and items that need to be used soon.
How do I organize a pantry for beginners?
Start by grouping similar foods together. Create zones for home-canned jars, dehydrated foods, dry goods, baking staples, preserving ingredients, everyday meal staples, and canning tools.
What is the biggest pantry storage mistake?
The biggest mistake is storing food without a system. When food is unlabeled, undated, exposed to heat, or hidden behind newer items, it is more likely to be wasted.
Conclusion
A food preservation pantry does not need to be large, expensive, or perfect. It needs to be practical, safe, and easy to use.
Start by choosing a cool, dark, dry storage space. Then create simple zones for home-canned jars, dehydrated foods, dry goods, baking staples, preserving ingredients, everyday meal staples, and canning tools.
Keep foods together when they make sense, but separate anything that can cause problems. Do not store potatoes and onions together for long periods. Keep strong-smelling foods away from delicate dry goods. Keep food away from cleaning products. Store heavy jars on strong lower shelves. Keep dry goods sealed and protected from moisture.
The best pantry is the one that helps you cook from what you have, rotate food before it gets old, and feel more confident about your home food storage.
Start with one shelf, one zone, or one basket. Over time, your pantry can become one of the most useful parts of your homesteading routine.
Want more beginner-friendly food preservation guides, pantry organization tips, and simple homesteading ideas? Subscribe to the Dreamsteading newsletter and get practical guides sent straight to your inbox.